

The side view of a character’s face is perhaps one of the most iconic views in anime illustration, and one that is very different from Western comic book styles. This can make it a hard one to master. We’re going to break it down for you today into some super simple, super reliable steps, so you can get your profile view faces right every time!
Drawing the outline of the face from the side
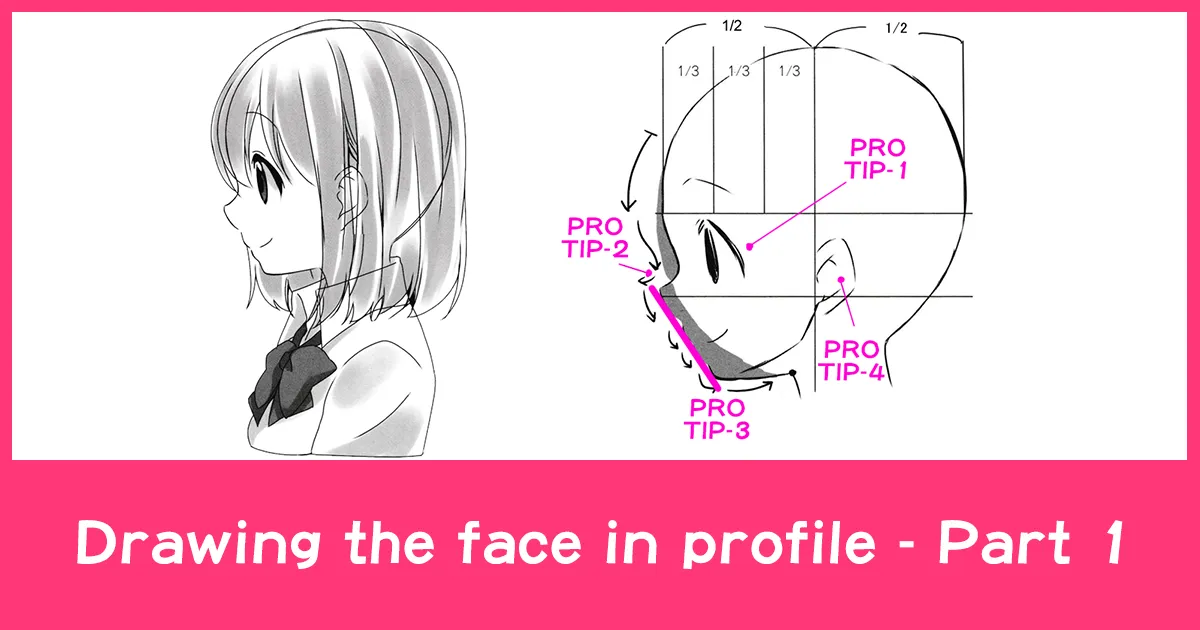
There is actually a simple balance for the side view of the face. Learning this will make the process much easier, and allow you to create perfectly balanced faces every time!
The height of the ears, nose and eyes will depend on the front view of your character – remember the features should be on the same level when viewed from the front and the side.
PRO TIP 1
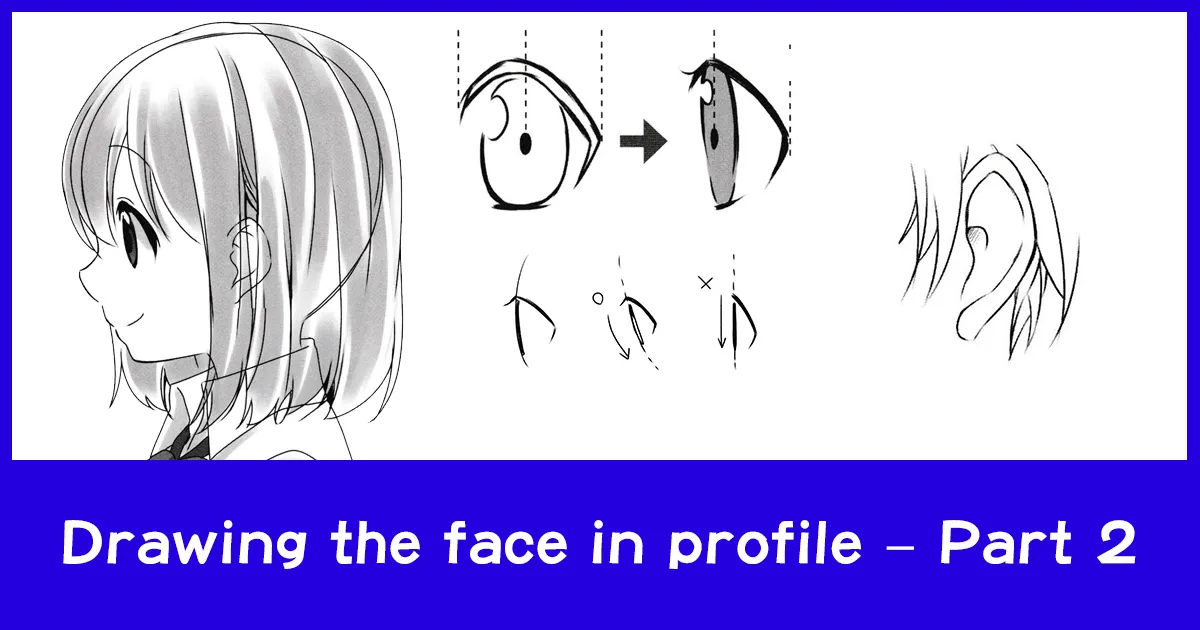
The iris of the eye should be in line with the line marking the first 1/3 of the front section of the face
PRO TIP 2
After drawing the long, smooth curved line of the forehead and bringing it up down to the peak of the nose, take your pen off the paper and start a fresh line for the more detailed nose/mouth area below.

PRO TIP 3
Drawing a straight line straight down from the tip of the nose to the chin will provide a good guideline for the mouth area. The nose, mouth and chin should all line up along this guideline for a nice profile view.
PRO TIP 4
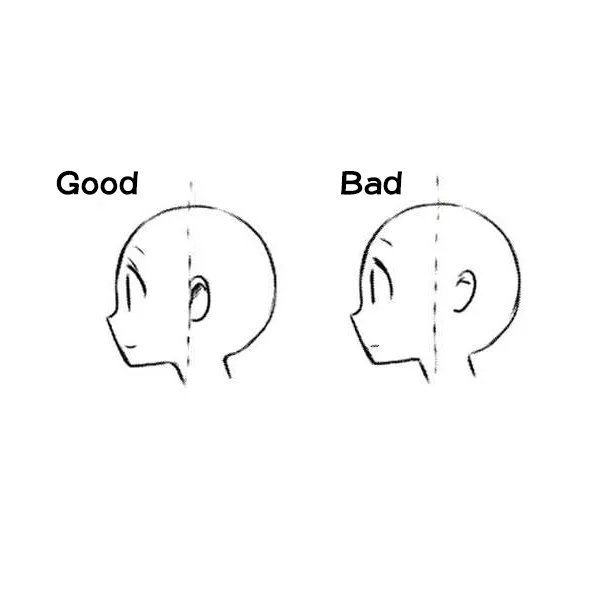
Make sure the ears attach to the head in the middle of the outline of the whole head.
Simple guidelines for drawing faces from the side
Let’s take a look at the guidelines we used above to measure the profile view of the face. Anime illustration can look simple at times, but it actually involves a lot of careful measurement. On the upside, this means that simply learning these measurements and practicing how to reproduce them, will make for perfect results every time!
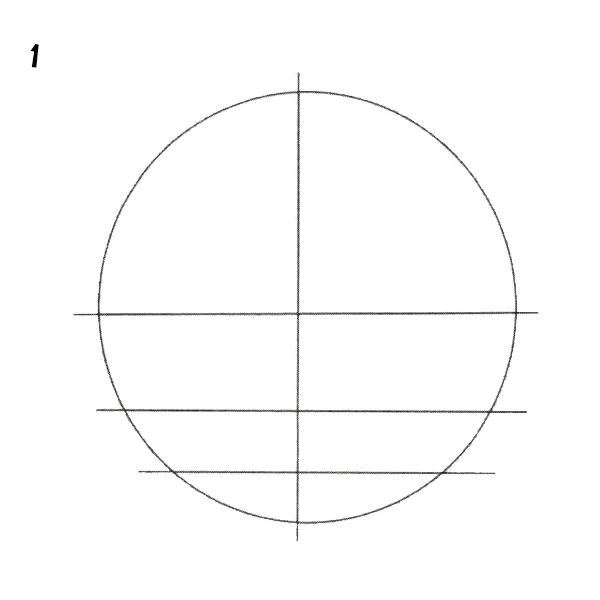
The main circle guideline should be divided into the above eight parts.
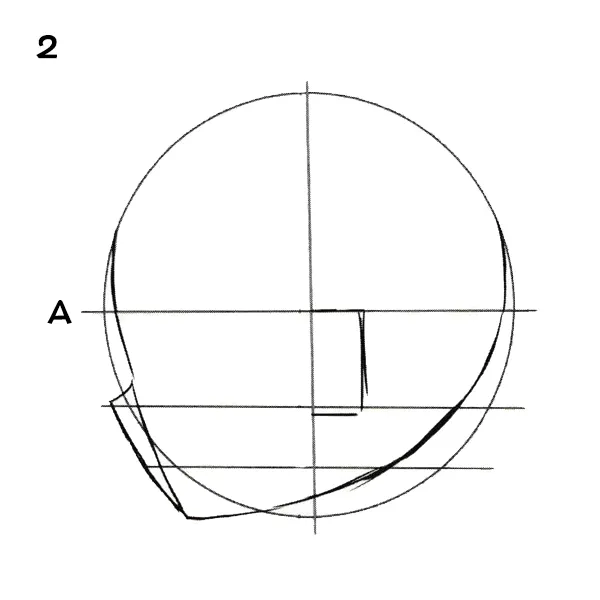
Start drawing in the line from the forehead to the nose, starting just above line A. Create the kind of “balloon” shape we can see for here for the outline of the head. Then estimate the level on which the pupil of the eye will come, and draw in the triangle shape of the nose/mouth area, starting from the level of the centre position of the pupil (see stage 4 for more details). The ear, as we discussed earlier, should originate from the vertical centre line, so draw a rough guideline in there.
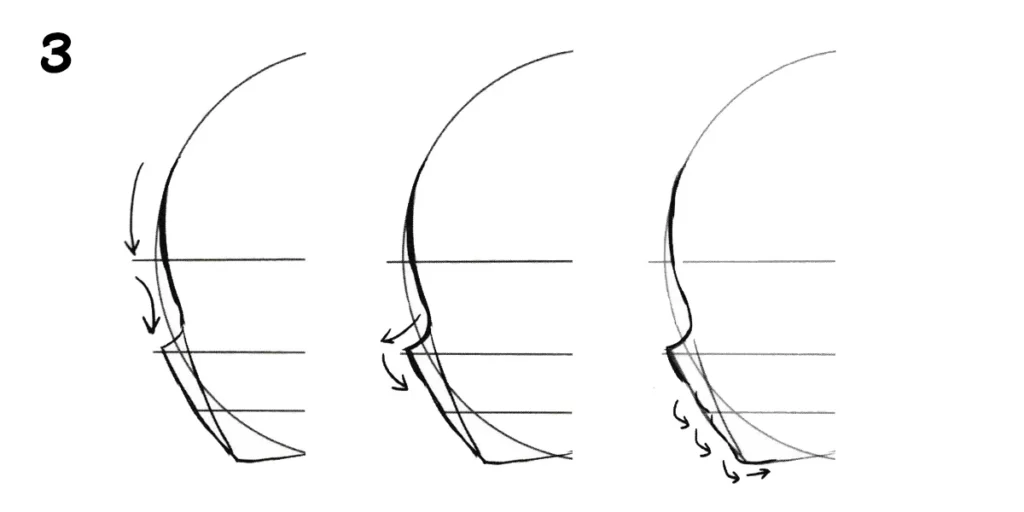
As I mentioned earlier, use long, smooth lines for the forehead and top of the nose, then start using shorter, more detailed strokes for the nose, mouth and chin. Draw the forehead first, then the nose, and finally the mouth and chin.
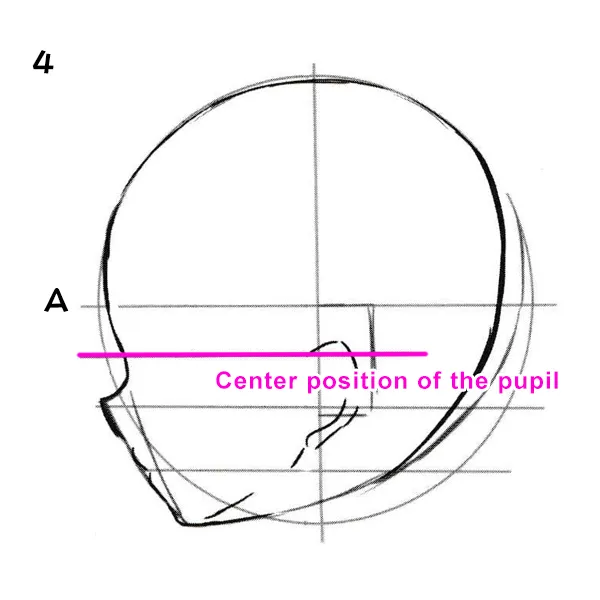
Here you can see the line I was talking about earlier, marking the centre position of the pupil. We drew in a rough position for the ear earlier, but let’s clean that up now. The top of the ear should come at the same level as the centre of the pupil, and the bottom of the ear should be on a level with the character’s top lip.
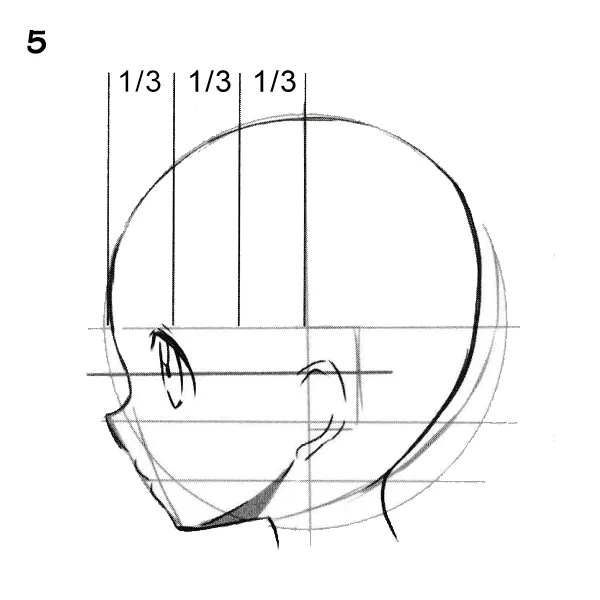
Connect the chin to the neck, using the “balloon” shape guideline we drew in earlier. Then we draw in the eye, using the 1/3 section guidelines to find the first 1/3 of the face. That’s where we want to draw in the iris of the eye.
The eyebrows should come in a little further forward than you might think. Bring them closer to the forehead, and don’t try to line them up exactly with the position of the eyes.

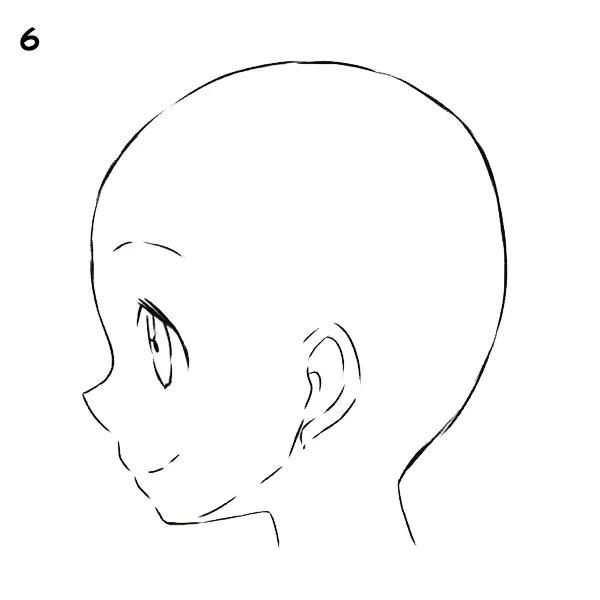
Then we can clean up the linework, add in some hair, and we’re done!
I hope todays tips will be useful when drawing characters from this profile view! Remember to use lots of reference images to practice with when drawing difficult angles – particularly ones like this where it’s harder to use your own face as a reference.
Part 2 of this lesson will show you how to draw the facial features from this side angle, so watch this space!
Drawing the face in profile – Part 2
Anime Art Academy is on Discord! Come and join our community!