
Japan’s “shrine maidens”, known as Miko (巫女) in Japanese, serve the Gods in shrines, carrying out daily duties like cleaning, praying and fortune telling. Their white and red outfits are very striking, and give them an air of mystery. You will probably recognise the white “kosode” shirt, and red “hakama” style loose pants, as this outfit is a very popular one in anime, gaming, and cosplay!
There are many finer points to this outfit that you might not realise about at first glance, but will look unnatural to Japanese people if you get them wrong in your work. Let’s study the outfit in detail today, so you can get it right when drawing it!
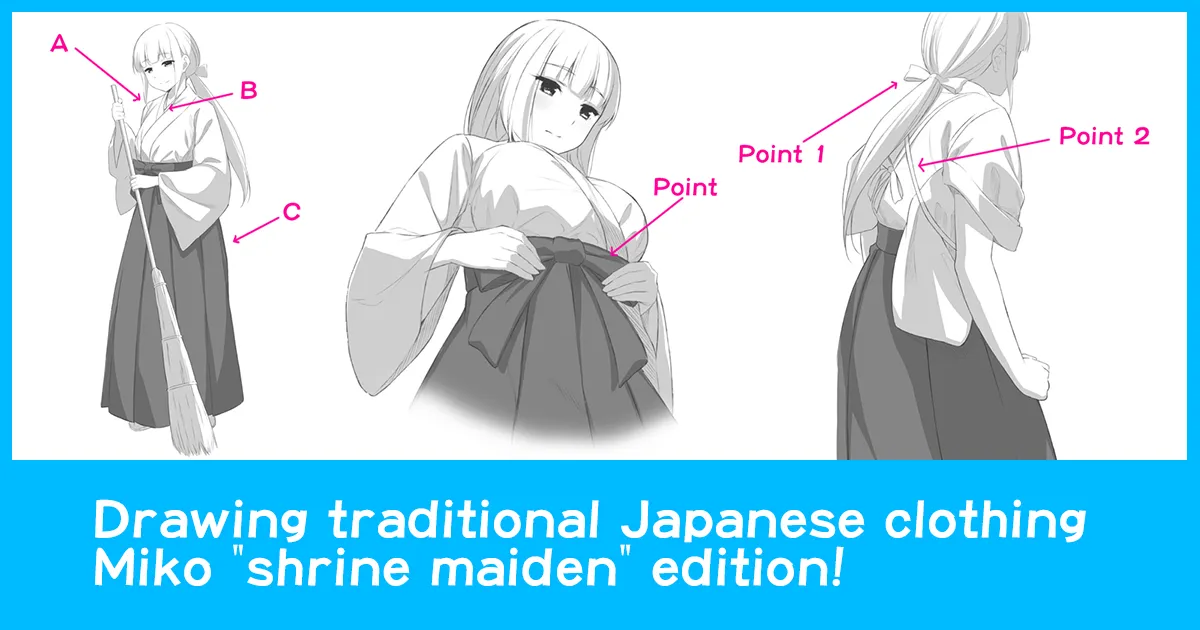
What are the different parts of Miko outfits called?
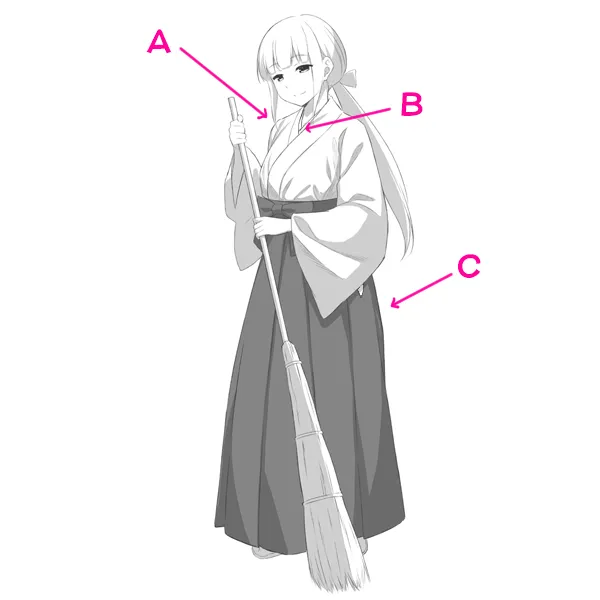
A 白衣(Hakue)
The white long-sleeved shirt on the top is known as a hakue. You might recognise the style as similar to the top half of a kimono or yukata. The white shirt is actually very long, and comes down almost to the ankles under the hakama pants. If you roll up the hakama, you will see this shirt rather than the maiden’s legs.
B 襦袢(Juban)
We only see a little glimpse of it at the collar area, but a Miko actually wears another white garment under the white shirt. In the past, it was considered that wearing Western underwear like bras would get in the way of the beautiful shape of the Japanese style clothing, and disrupt the clean silhouette. So classical Japanese underclothes like this juban were used. In modern times, it has become common to use other underwear, especially in the humid summer where the juban would be too hot, restrictive and impractical.
C 緋袴(Hibakama)
These bright red hakama are known as hibakama. The name comes from a combination of the word for scarlet “hi iro”, and Japanese style pants “hakama”. Red is the most common colour for hibakama, but in some shrines we see other colours like white or dark green. The shape can also vary, with some styles closer to a skirt, or closer to fully divided trouser-style pants.

A key point that you might not notice if you have never worn the outfit, is that there are large slits on the sides of these hakama, where the white undershirt can be seen.
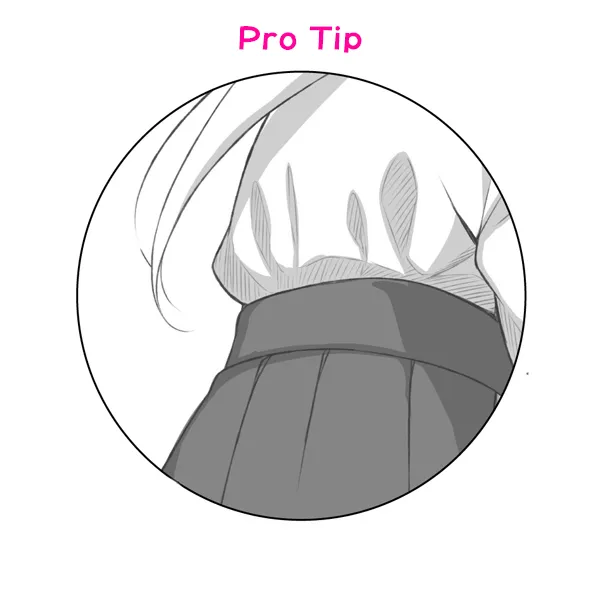
Remember to show the difference in the two fabrics of the shirt and the skirt. The shirt is much thinner, and prone to creasing, whereas the pants are a heavier material that doesn’t crease as easily except at the ironed folds built into the design. When colouring, we will also get a nice contrast between the clean white of the shirt and the bright red of the pants.
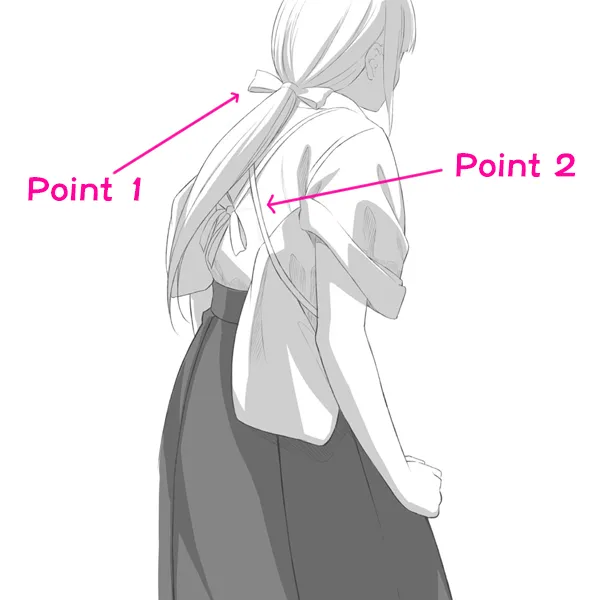
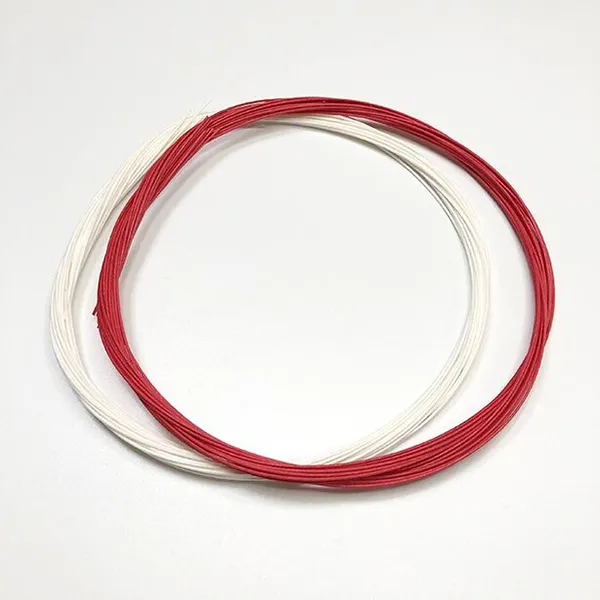
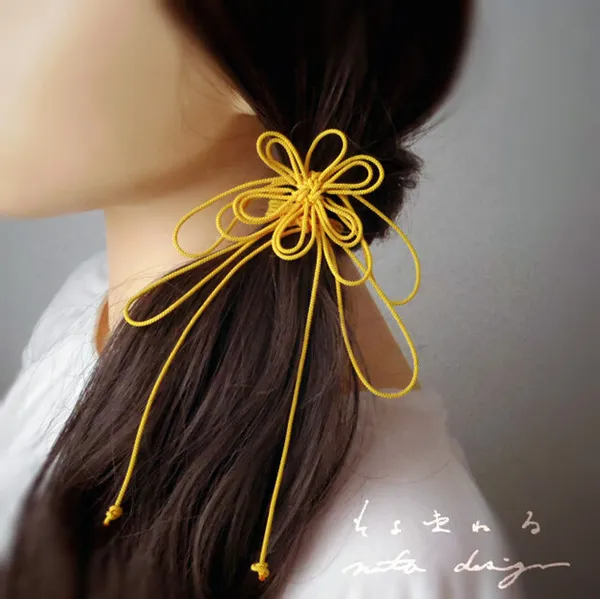
Point 1
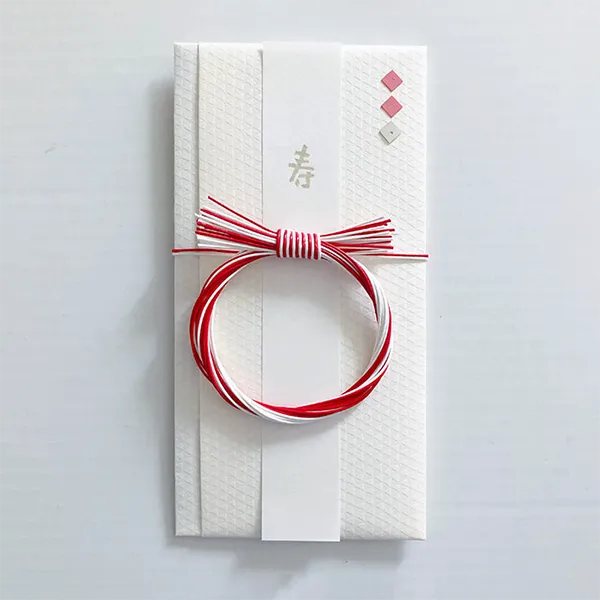
A Miko will tie her long hair with a string known as a mizuhiki. This string is not made of fabric, but actually a type of Japanese paper. There are many other uses for this string, such as tying up traditional envelopes used for gifting money at times of celebration. It’s also often used for more fancy hair accessories that can be worn with other traditional Japanese clothing.
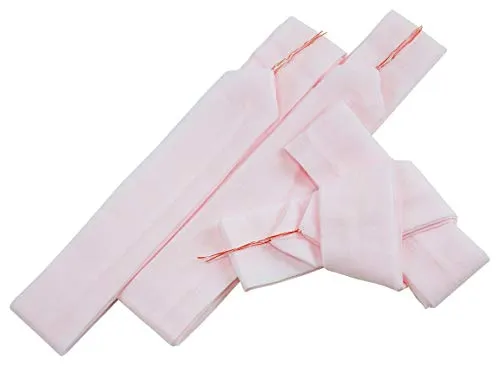
Point 2
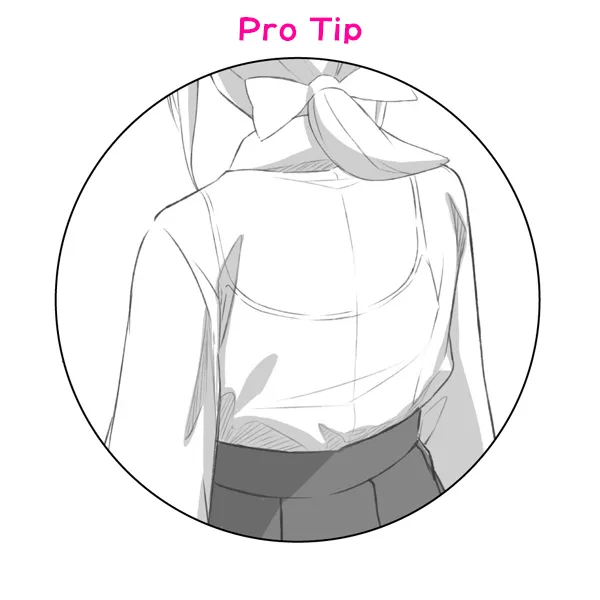
The sleeves of the white shirt are long and wide, and can get in the way of some activities. Miko use a string known as a “taski” to bind the sleeves and pull them up out of the way. Pay attention to the way it is crossed and tied at the back – getting details like this right will be very impressive to a Japanese audience, and help improve the believability of your work!
Tying the hibakama
Learning how the hakama are worn and tied will help your work look more realistic, so let’s take a look!
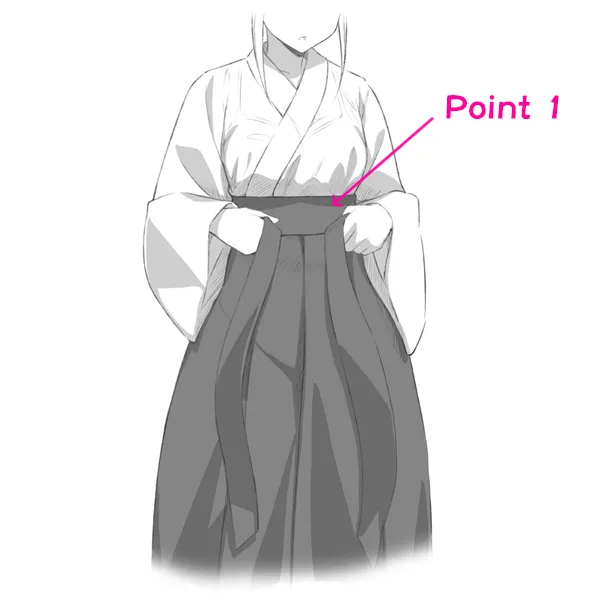
Point 1
The pants are tied in a relatively high position, near the waist/navel. The higher the pants, the longer the Miko’s legs will look, and it can make them look taller and slimmer.
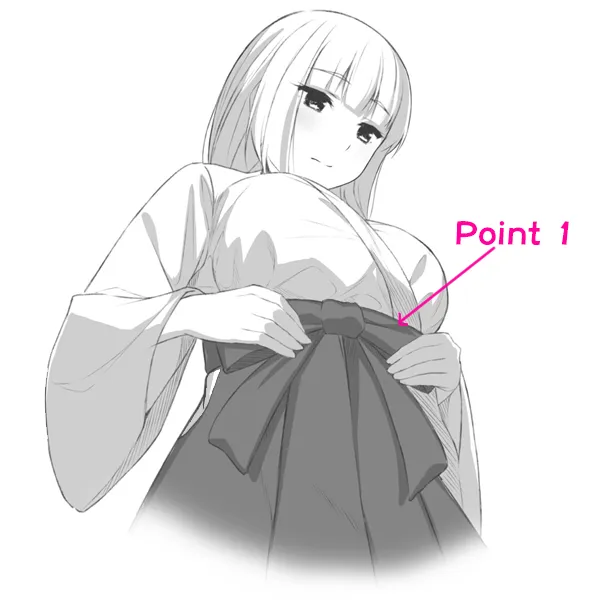
Point 1
The Miko ties the ribbon tightly at the front, to stop the hibakama getting loose or slipping down.
The clothing is worn in the following order – bra/camisole, juban, hakue, hibakama. In the summer when the Miko isn’t wearing a juban, you might see the camisole through the thin fabric of the hakue.
That brings us to the end of today’s rundown! How did you find it? I hope this has helped deepen your understanding of this beautiful traditional Japanese garment. Once you’re used to drawing this classic style of Miko clothing, you can start experimenting with different, original styles for your character costumes! Shorter sleeves, short “skirt” style hakama, and various different colours for the shirt and pants are all options you could explore. Enjoy!
Anime Art Academy is on Discord! Come and join our community!