
Legs make up a whole half of a character’s body, so it’s no surprise that they’re a super important part of getting character poses right. Bent knees are important for poses like crouching, sitting and running, so today let’s learn how to draw them bending at the knee in a natural way!
The first part of this leg lesson where we talked about straightened legs movement can be found here.
Bending the knee
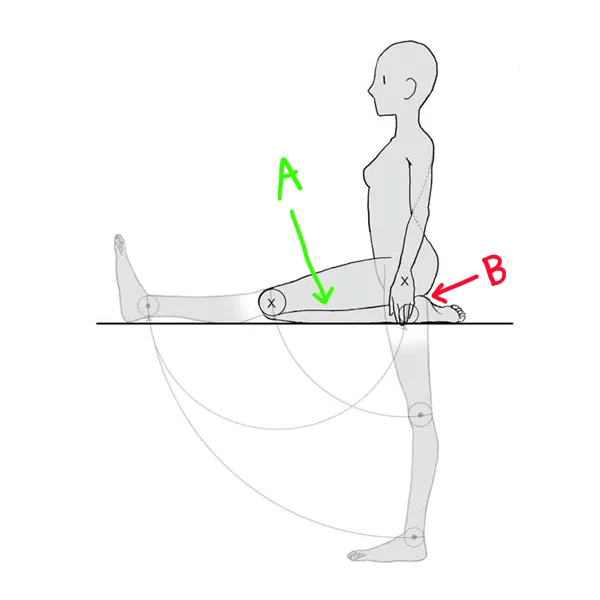
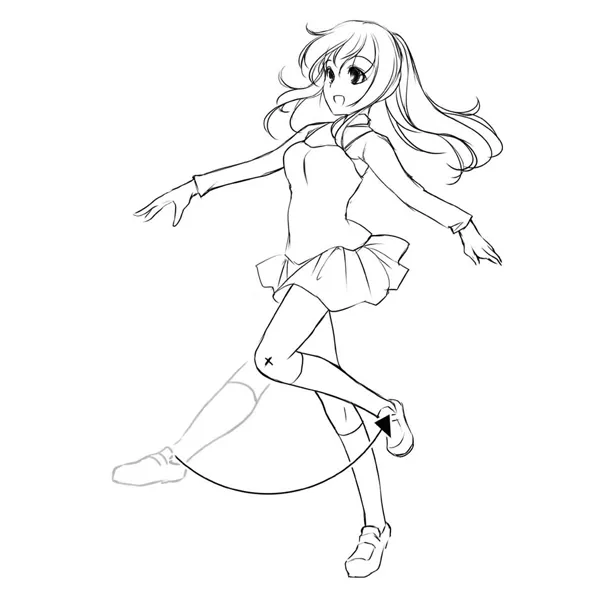
Last time we talked about how the length of a leg can be gauged by using the hip as the middle point of a compass, and drawing a circle out from there. The same is true of the lower leg! We can use the knee as the centre point, and draw a semicircle out from there to show the position of the ankles.
How far can the knee bend?
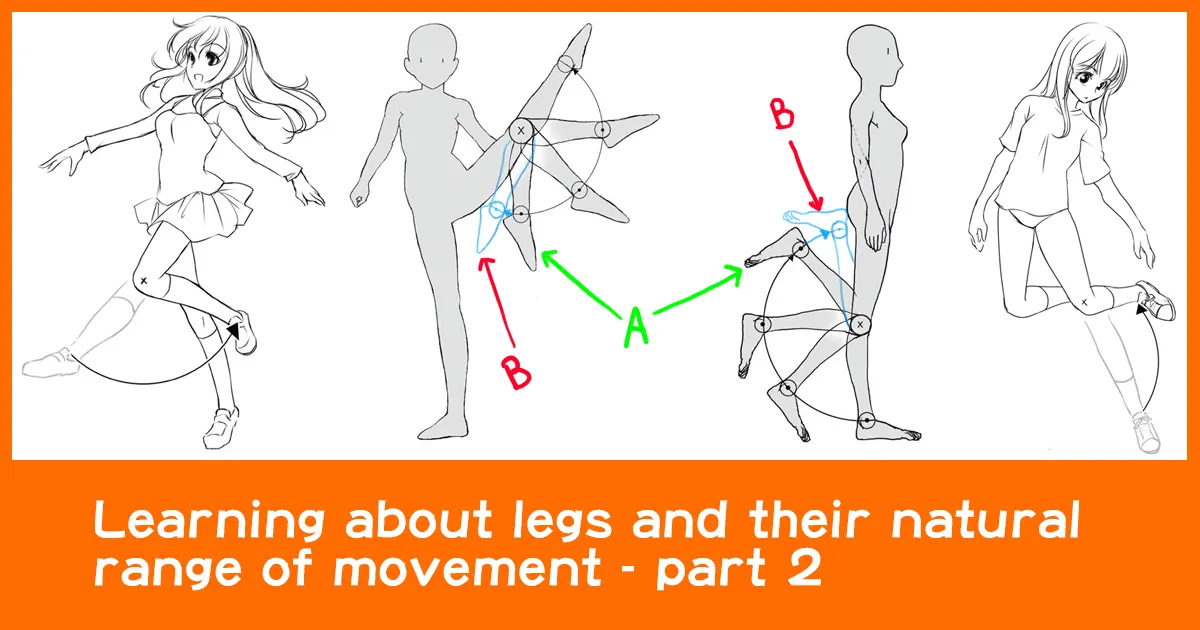
The following images show how much the knee can bend naturally. Remember, the knee is like a hinge – it can only bend in one direction – the maximum “flex” is a straight leg, and the maximum “bend” is when the leg is totally doubled back on itself.
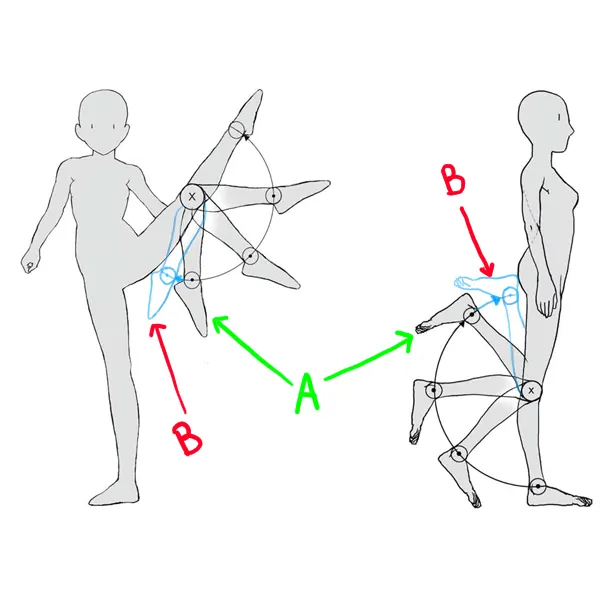
Point A
When bending the knee naturally, the thickness of the calf causes resistance, so point A is usually the maximum bend we can get.
Point B
However, if there is some kind of outside influence – for example, if the character is pulling their leg in towards their body with their hand, or if they’re sitting in a kneeling position with their body weight squashing their legs down, it is possible for the leg to reach the positions marked B.
About “seiza” the traditional Japanese kneeling position
Seiza literally means “the correct way to sit”, and while quite formal and traditional, it is still a popular way to sit in Japan. Many tables in houses and restaurants are low down, and require people to sit either in seiza position, cross legged or with their legs stretched out.
Let’s talk about some of the points we need to be careful of when drawing a character in seiza position.
When drawing someone kneeling like this, it helps to first draw a rough image of the legs out straight in front of the character. From there, you can bend the knee back and under the body into seiza position.
Point A
Because the character is resting their whole weight on the bent legs, the calf is squashed flat to the thigh, making it look very slim.
Point B
The heel should be digging in to the character’s bottom.
Key point when drawing seiza
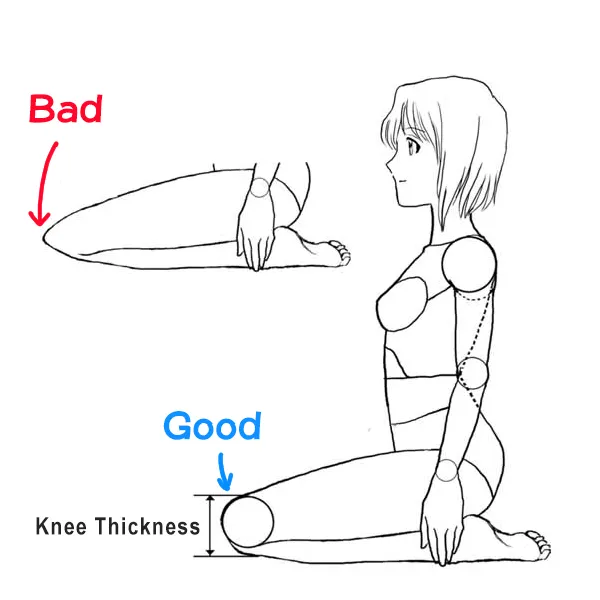
This is a very common mistake with both knees and elbows, so be careful not to make this mistake! The shape of the knee, and the thickness of the bones and muscles means that
More Pose Examples
This is different type of kneeling pose, where the character’s bottom and thighs are raised up. But the technique is the same! Try first drawing a rough sketch of the leg in an extended position to check the length and proportions of the leg. From there, use the knee as an axis to bend the leg up. From this angle, perspective and foreshortening does come into it too, so keep that in mind!
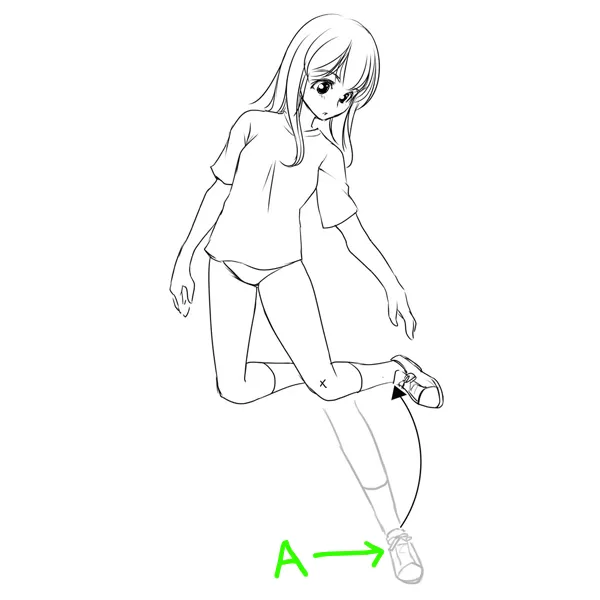
Here we can see that the knee is still forming the centre of the arc, but because of the angle we see the arc from, it’s more oval than a perfectly round circle. It can take a while to grasp these kind of things, but we go over perspective and foreshortening in much more detail in our courses!
Point A
Drawing out a straightened leg first will help to get the shape and balance of the foot and leg right.
Again, for this pose, I first drew a rough sketch of the leg fully extended, before using the “compass” technique to pull it back in an arc. That way we get the length of the leg right when we draw it in its bent position.
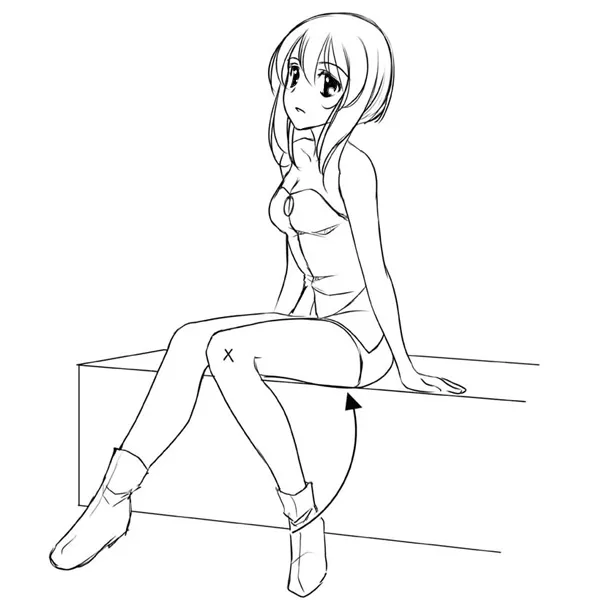
For a sitting pose with bent legs, and legs together, imagine where the leg would touch if fully bent. The ankle should line up with the hip joint, and the heel should line up with the character’s bottom.
That brings us to the end of this investigation of how legs look when bent! Remember to think of the compass/arch shape when drawing the leg, so that you get the proportions right. First of all, you should try drawing a character in a side-on, neutral pose, like the one in the very first image in this article. Try drawing the character in that position with their leg pulled up at the back, at various angles. Get this right, and you can start moving on to more difficult positions later!
Remember, you can check back and read all of the first article in this series here →
Anime Art Academy is on Discord! Come and join our community!