
In this series of lessons, we’re going to be introducing various ways to make your characters’ expressions look more attractive and “manga”-like!
This time, we’re going to be focusing on negative, angry emotions. These facial expressions can be used in all kinds of situations, whether a character is angry at someone else, or frustrated at themselves. We’ll be studying a whole range of emotions today, from slight irritation to blind rage!
Let’s learn how to use them in our work!
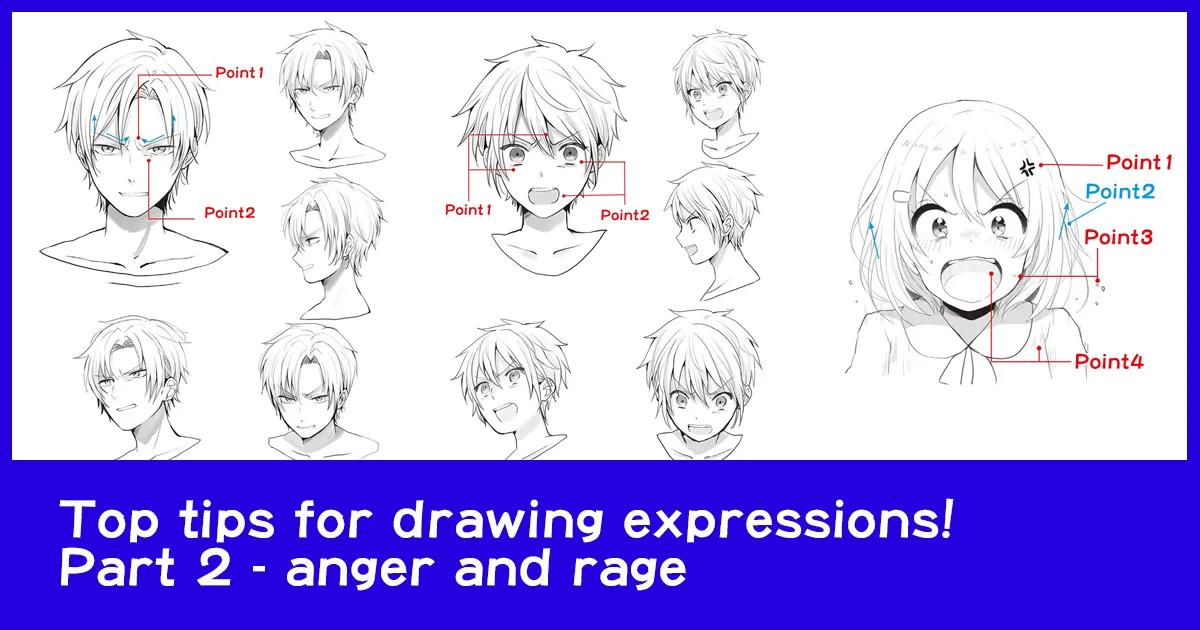
Anger and Irritation
An angry expression can be used both when a character cannot conceal their irritation, or when they are purposefully trying to show their anger to intimidate somebody. In manga, to make anger more obvious, we often exaggerate the expression. The eyebrows being pulled together in kind of “check mark” shapes is a common feature of an angry expression. The way the mouth is opened can really tell us a lot about the type of anger a character is feeling – clenched teeth, for example, show the character is trying to hold back their anger.
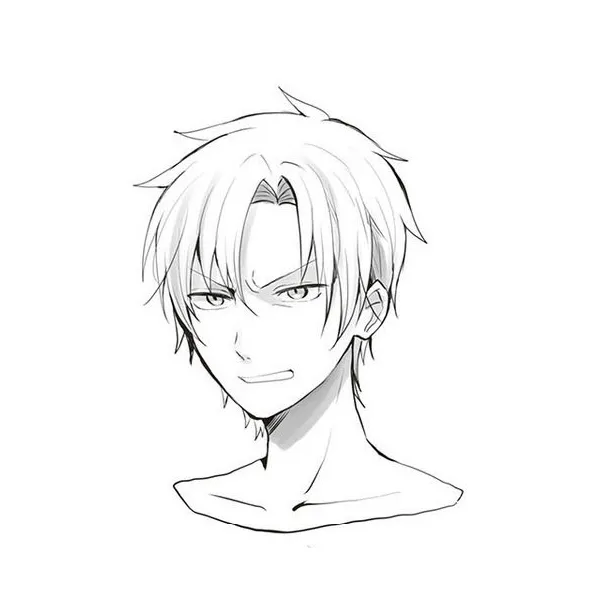
Front view

Point 1
Draw wrinkles between the eyebrows, and have them lower in the middle, higher at the outer edge, in that “check mark” shape!
Point 2
Drawing wrinkles under the eyes too is a good way to show that the eye area is all very tensed and scrunched up.
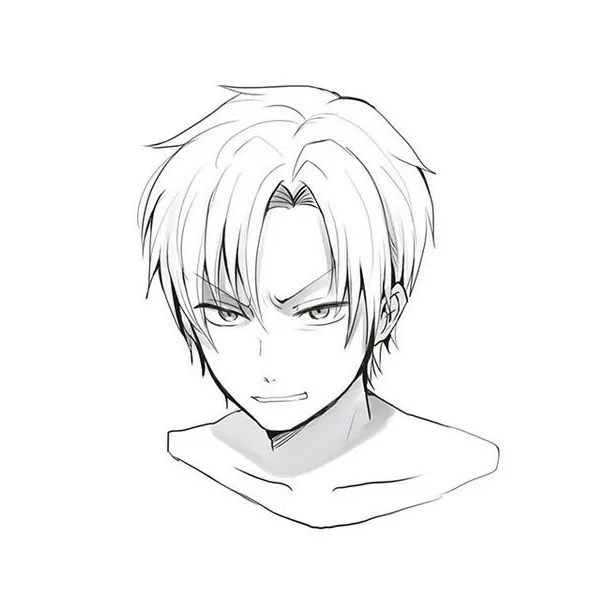
3/4 view
Side view

Low view
High view
Practical techniques
The following is a more “comical” expression, showing a more sulky kind of anger. Here the character is puffing up their cheeks and pouting to show a less extreme level of anger.
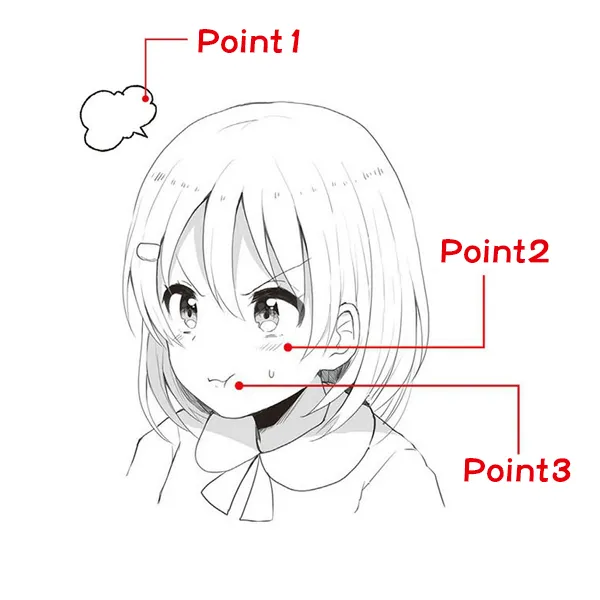
Point 1
The little steam cloud “manpu” (comic mark) shows how she’s steaming with anger, but in a more comical way.
Point 2
Making the cheeks red shows how she’s getting red in the face, and also gives a certain cuteness to the expression, which is always appreciated in manga and anime!
Point 3
Having her pout and puff up her cheeks makes for a milder, more comical anger.
Rage
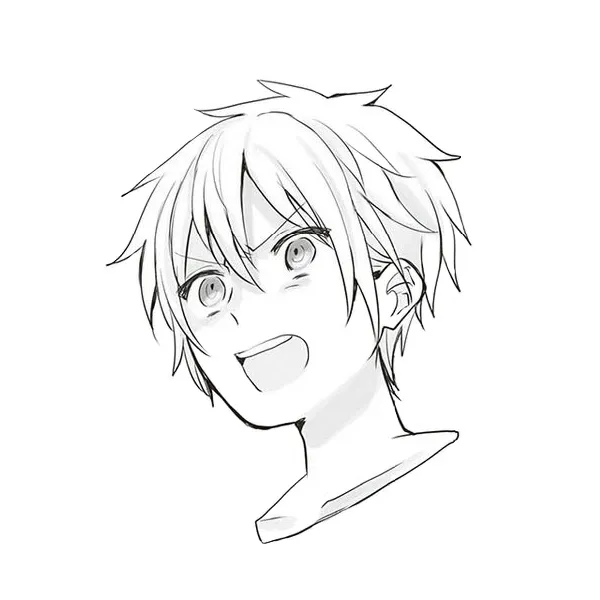
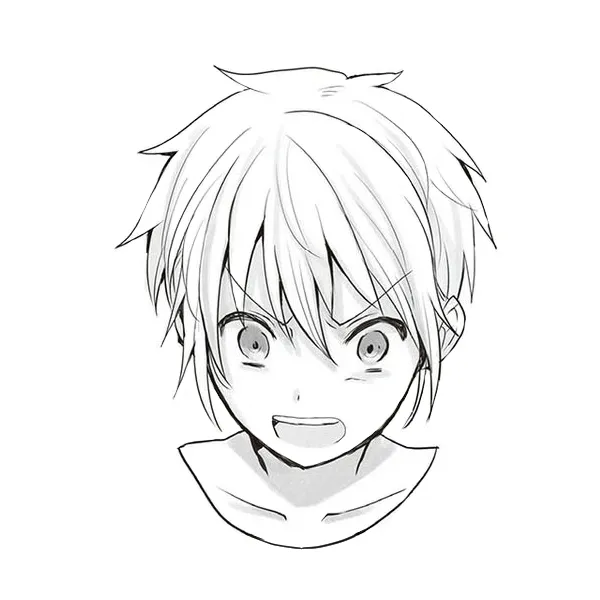
“Rage” is an explosion of anger, where we might see the character really going crazy and shouting. We see even more extreme wrinkles between the brows, showing how tightly the brows are being drawn down and inwards in anger.
The character might be shouting out a complaint, or yelling their rage at someone, so their mouth is open wide. They’ve totally lost any sense of their surroundings, and don’t care how they look, so their eyes might be wide open in a crazed expression.
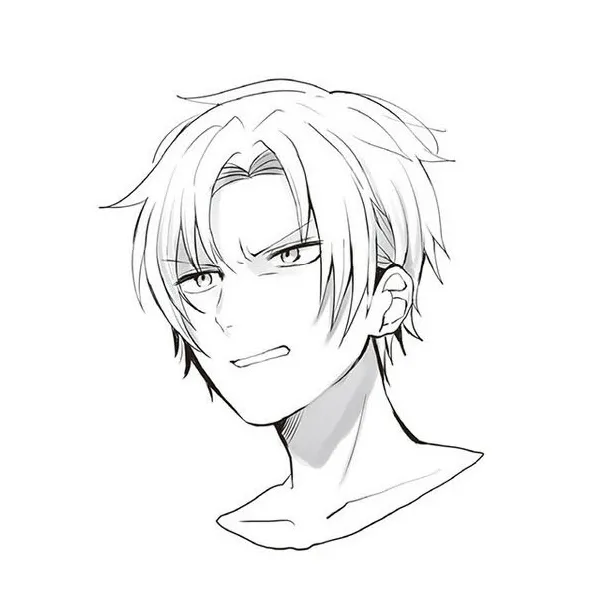
Front view
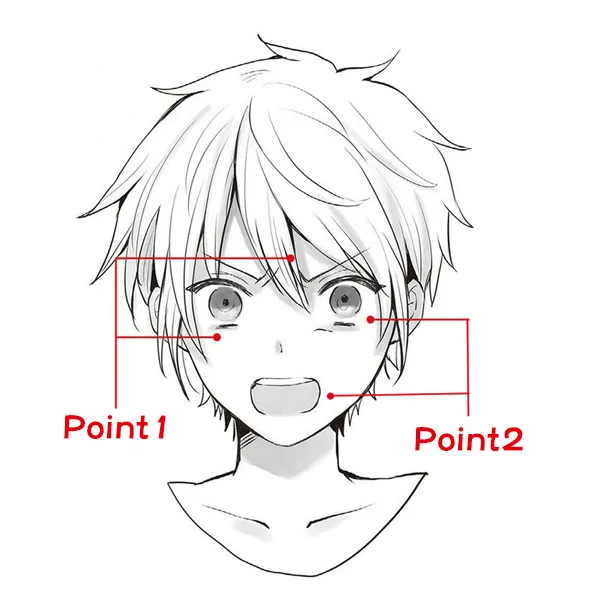
Point 1
Same as for anger and irritation, we see the eyebrows drawn together, and wrinkles below the eyes. The more extreme the angle of the brows, the more extreme the anger!
Point 2
Remember how the last character was kind of gritting their teeth to suppress their anger? This time we see a wide open mouth, showing how the character is out of control, and doesn’t care about being seen as angry.
3/4 view
Side view
Low view
High view
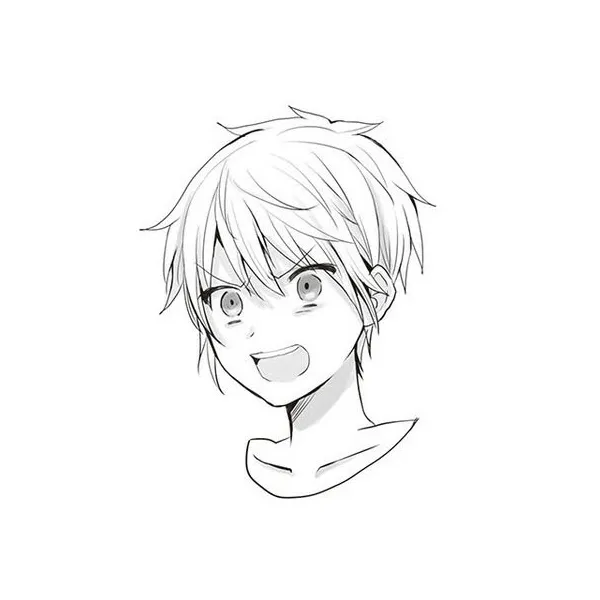
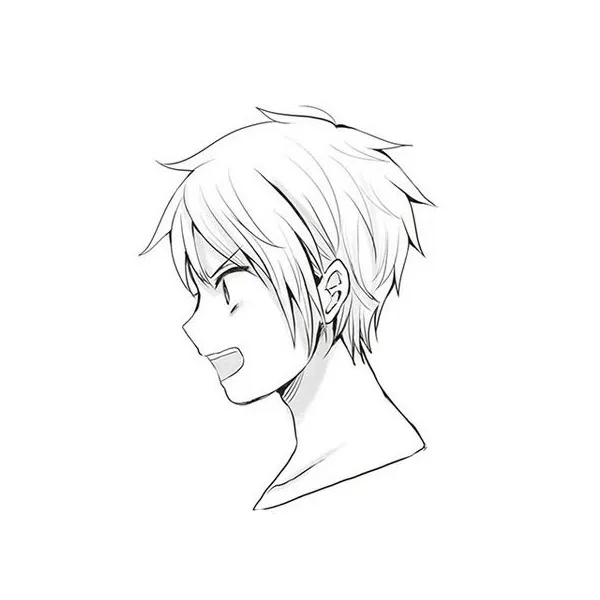
Practical techniques
Here the character is shouting out with rage, with eyebrows deeply furrowed and mouth open wide.
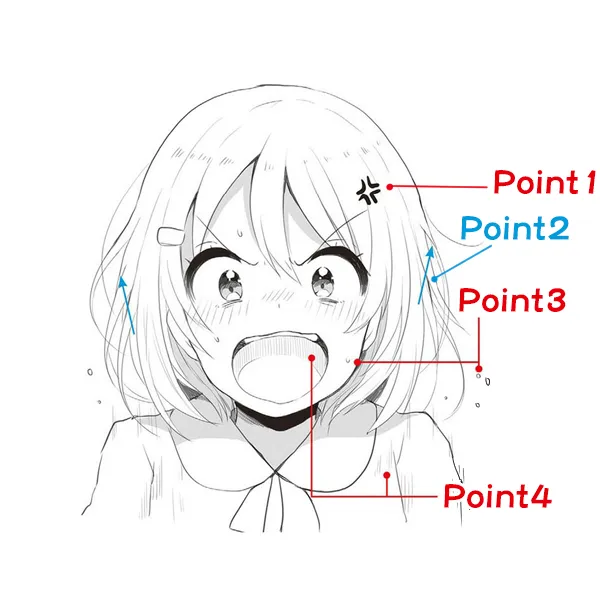
Point 1
This time we have a vein mark for our “manpu” (comic symbol), which shows she’s ready to burst with rage
Point 2
Having the hair “fluff up” a bit, and adding some movement can emphasise a character’s rage. You might even see hair standing up on end when a character is super enraged! This is a traditional “comic” expression of rage that we see both in manga and in western media.
Point 3
Adding some sweat to the face and even some little bits of spit flying around the character can emphasise their rage, and how loud they’re shouting.
Point 4
The vertical lines here in the mouth and on the clothes not only act as shading, they also give the piece movement, and suggest that the character is lunging forward with rage.
There we have it! I hope these explanations, and all the various reference images will prove helpful to you in your work! We can’t wait to see you get creative with all different angry expressions. Enjoy!
Anime Art Academy is on Discord! Come and join our community!