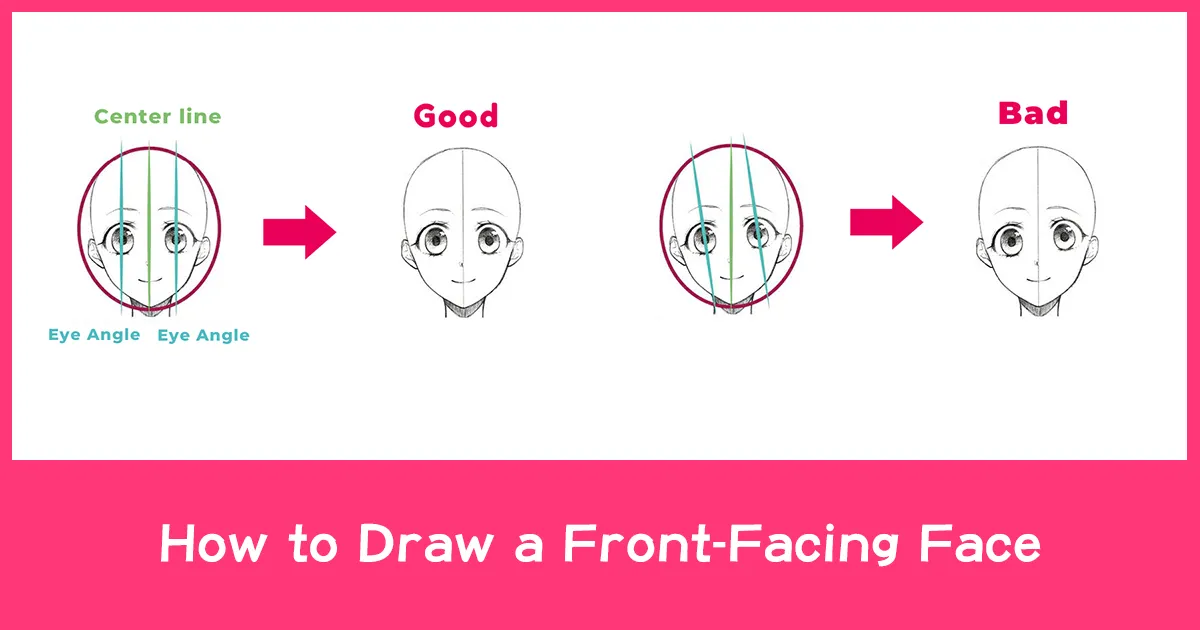


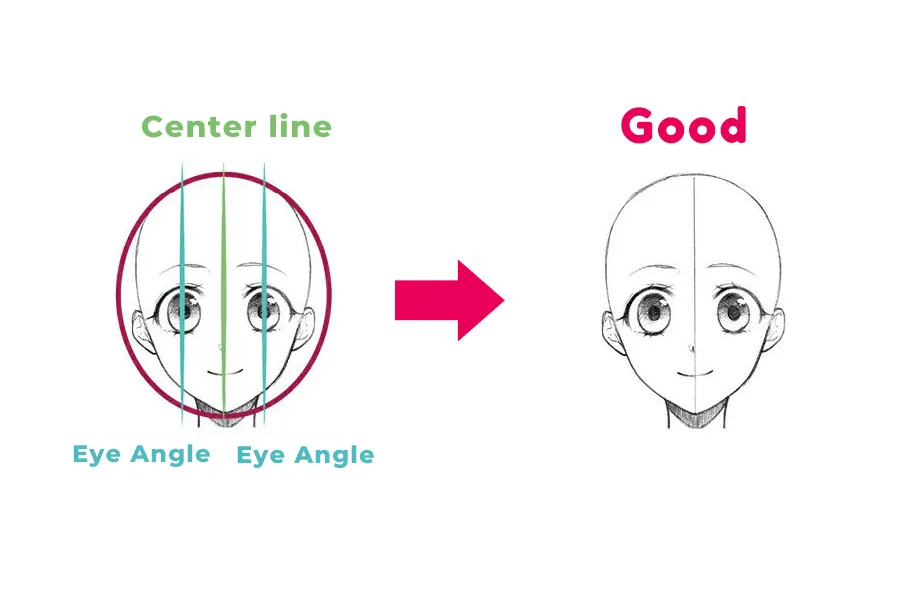
To draw a front-facing face, it is important to use a centre line that runs vertically through the middle of the character’s face as a guide, so you can draw the face symmetrically on both sides.
However, just like real human faces are not perfectly symmetrical, it is not necessary to make the character’s face completely symmetrical. Often, the left-right balance of the character’s face can be disrupted by the artist’s drawing quirks or habits.
The contour of the face is especially prone to becoming unbalanced, and is a particularly difficult area. So it’s important to be very conscious of the centre line guide and work hard to get it symmetrical! Also, check to make sure that the size and position of the eyes on both sides are not off, the position of the chin is not off, and the cheeks are not too flat or too rounded.
The most important thing is to know your own drawing quirks and habits. For example, if the contour on the right side of the face tends to bulge out too much in your characters, be conscious of this while drawing. It’s a good idea to start drawing on the side you’re more comfortable with and then work to make the other side match that first one.
Let’s try drawing a face facing forward!
The angle of the eyes is parallel to the centerline that serves as a guide.

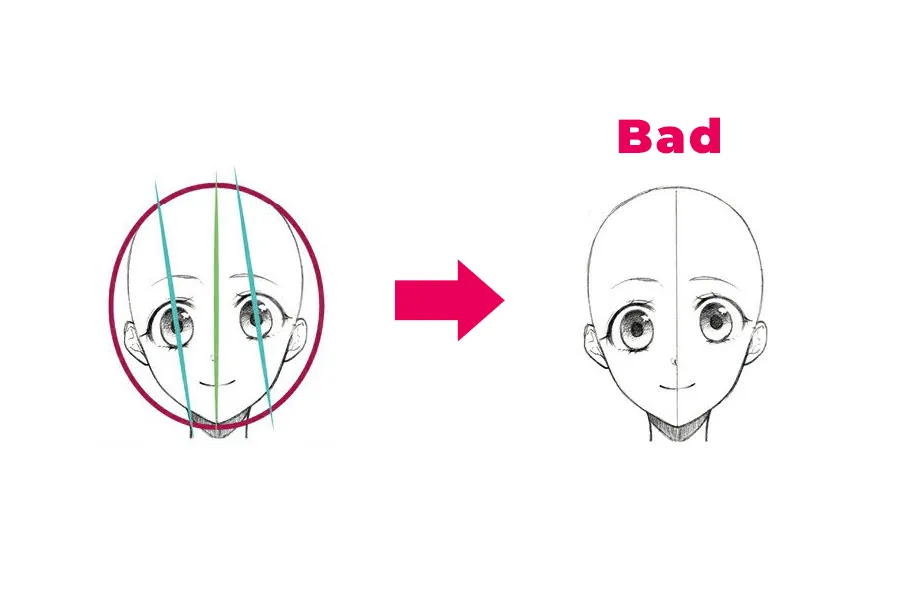
When the angle of the eyes is different from the center line, the balance of the face is disrupted.
Tips
When drawing a face from the front, draw the contours, eyes, eyebrows, and ears symmetrically on both sides. Especially since the symmetry of the contours and eyes is easily thrown off, try holding the paper up to the light to check. When drawing digitally, using the flip tool can help you check if the balance is off.
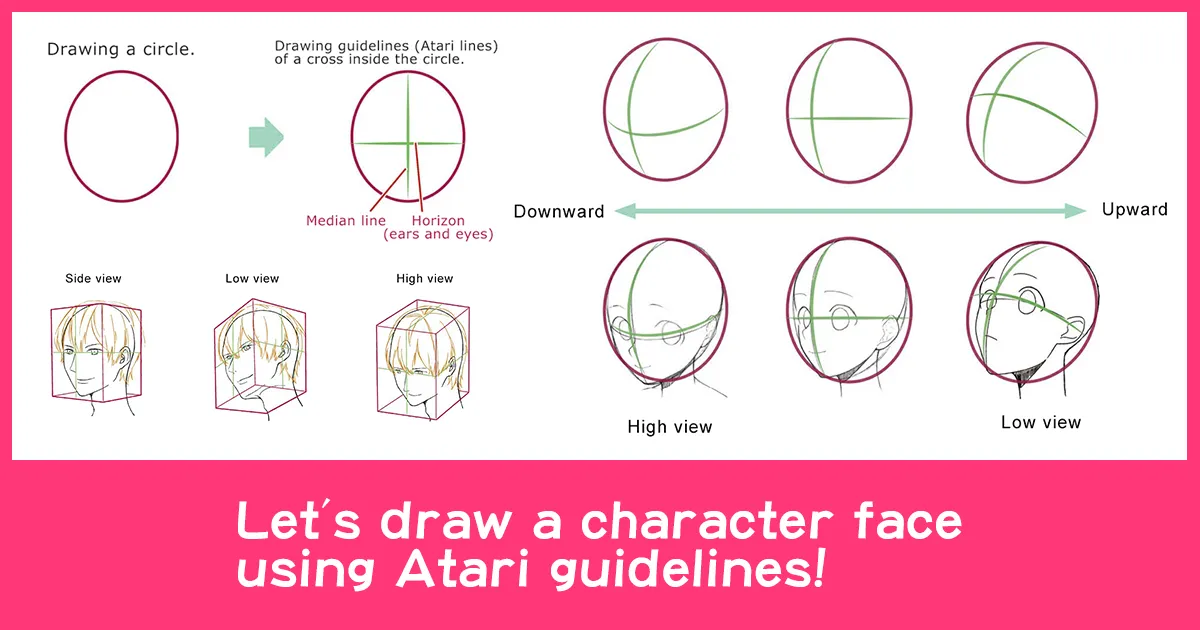
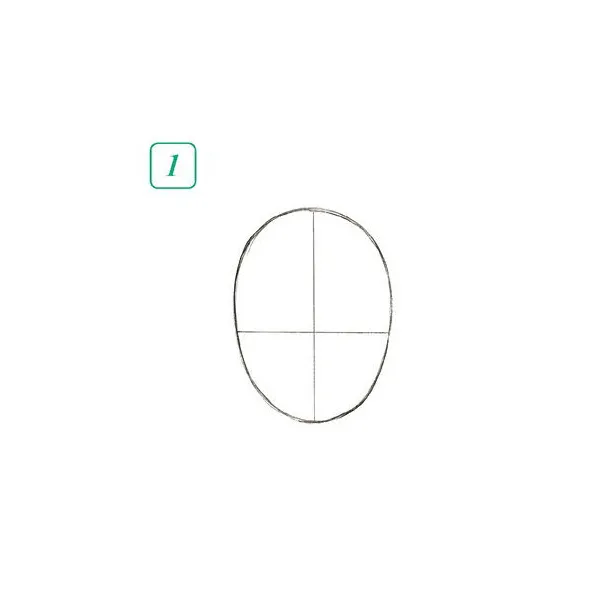
1 Drawing a guide line (Atari Line)
Draw a horizontal line and a center line within the circular guidelines of the facial contour.
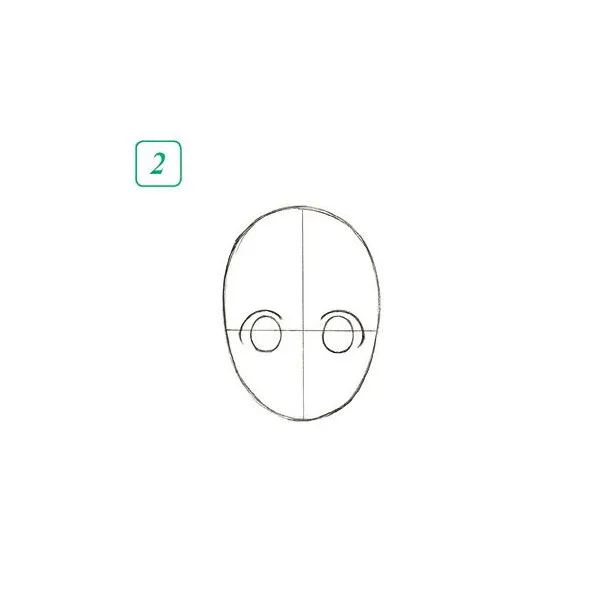
2 Decide on the position of the eyes
Using the vertical centerline as a guide, determine the position of the eyes symmetrically on either side. Also, position the centers of the left and right pupils on the horizontal guide line.
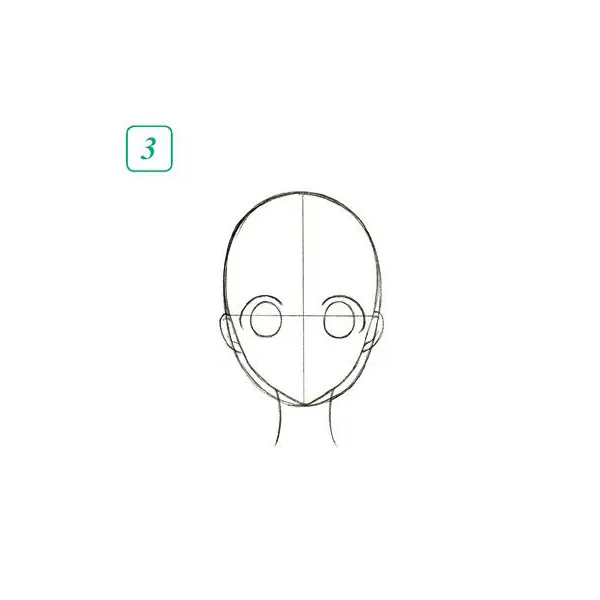
3 Draw the outline of the character’s face, as well as their ears and neck.
Consider the balance between the size and position of the eyes, and draw the outline of the character while determining the placement of the ears. Drawing the ears so that their base is aligned with the horizontal line will improve the balance.
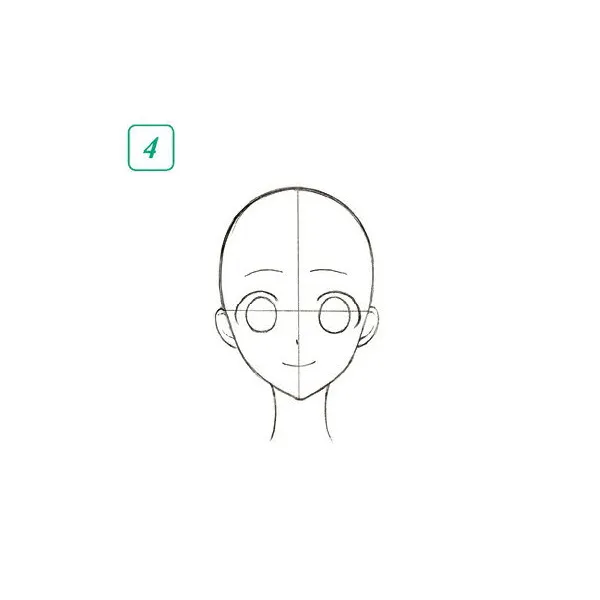
4 Draw eyebrows, nose, and mouth
Draw the eyebrows, nose, and mouth in that order while considering the balance with the eyes, and bring out the distinctive features of the character’s facial features.
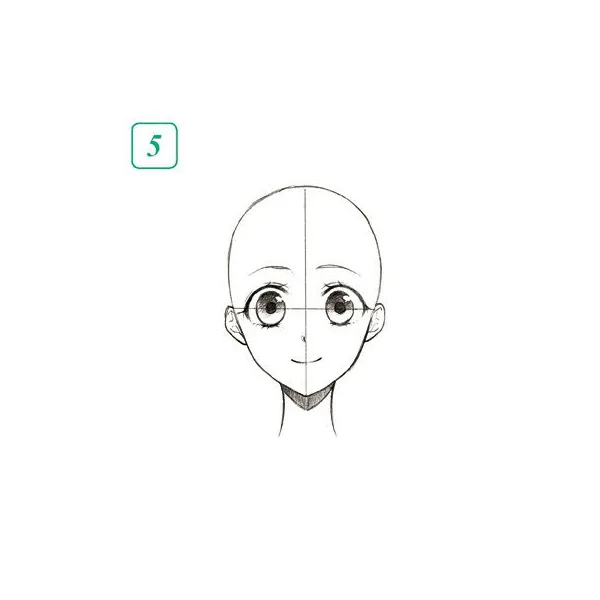
5 Draw the details of the face.
Imagine the image of the character you want to draw and make slight adjustments to the facial features.
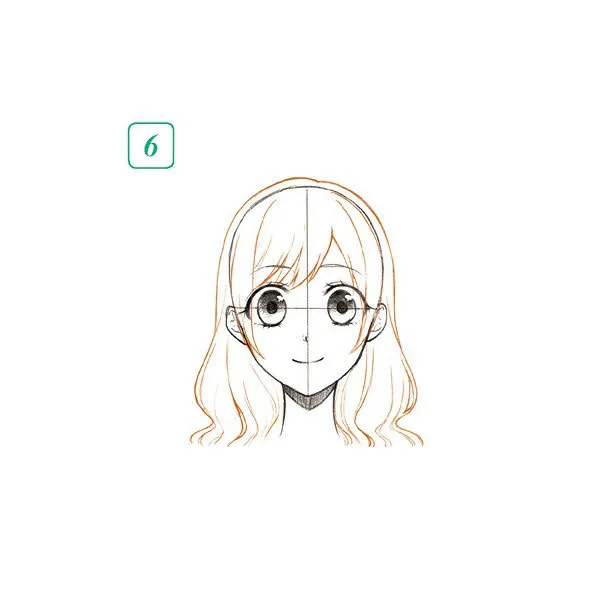
6 Drawing hair
Draw the hair outside the outline of the head.
When drawing hair, try to create a natural wave that goes with gravity.
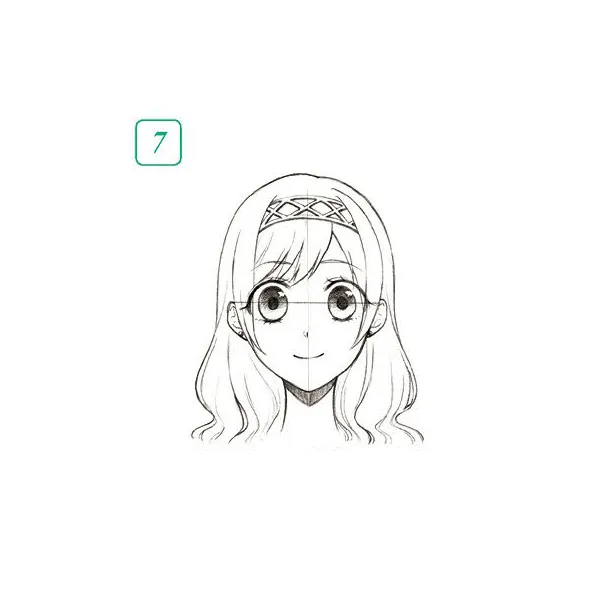
7 Refine the details
Be especially careful when drawing the bangs and the side-bangs, because these also have a significant impact on the balance of the character’s face.
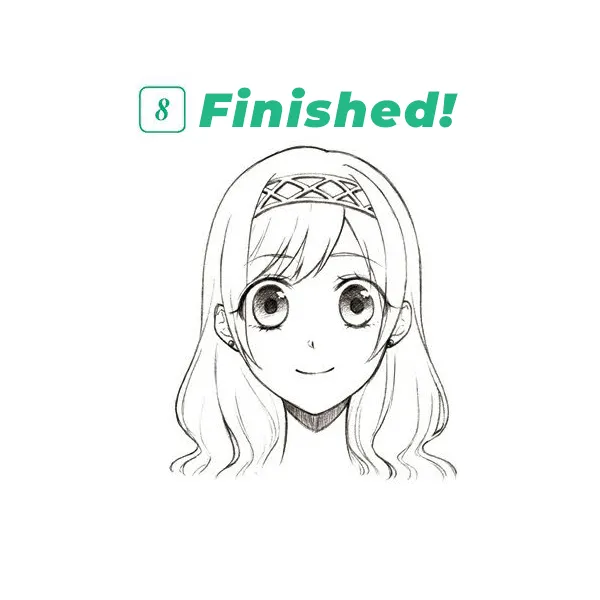
8 Finished!
Anime Art Academy is on Discord! Come and join our community!