

When drawing a character’s face, it’s very helpful to use Atari lines as guidelines. These lines help determine the rough position of the facial features such as the eyes, mouth, and hair, and the basic method for drawing a face is to first draw these parts in detail. In this lesson, we will learn how to use Atari lines as guidelines and practice drawing front-facing and side-facing faces using them.
1 Basic Usage of Face Atari Lines
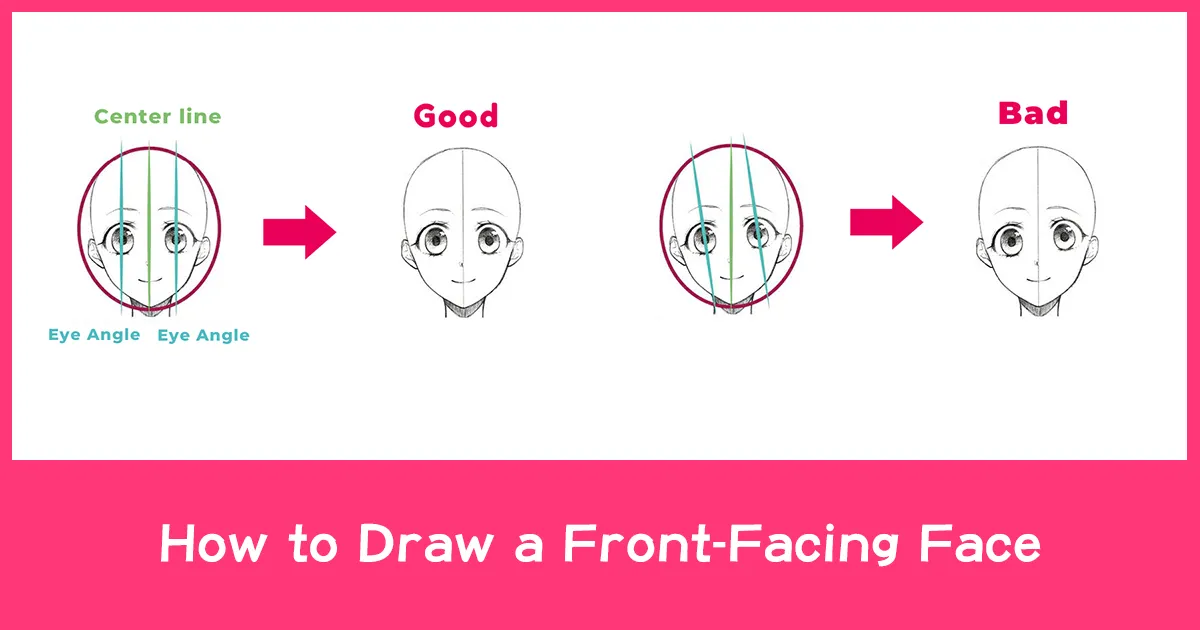
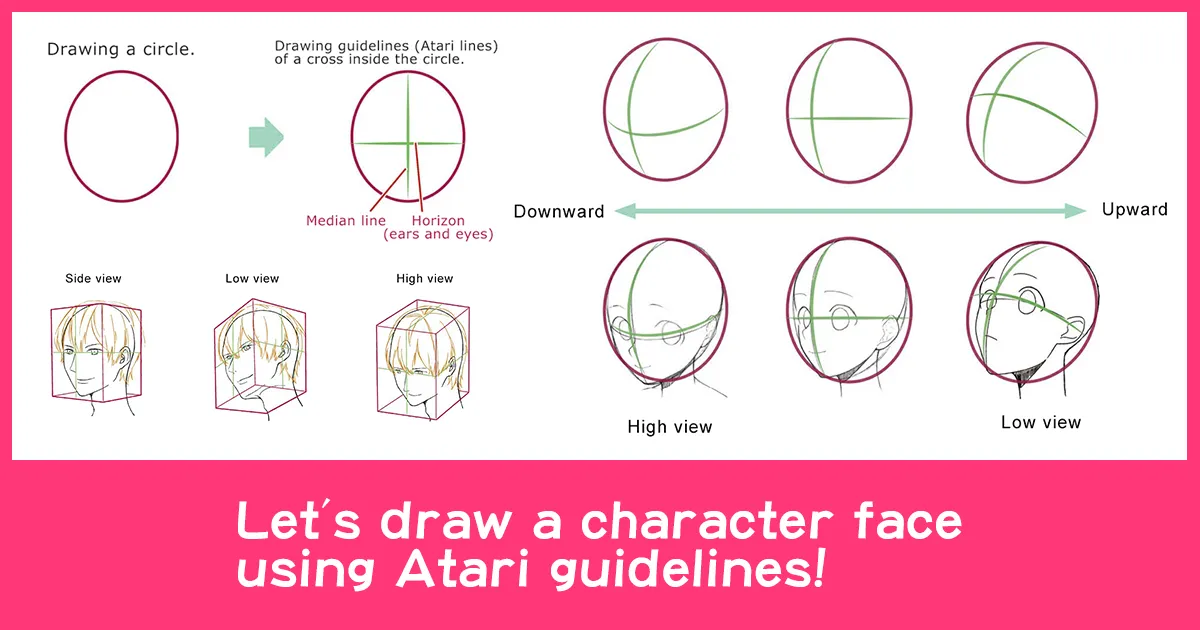
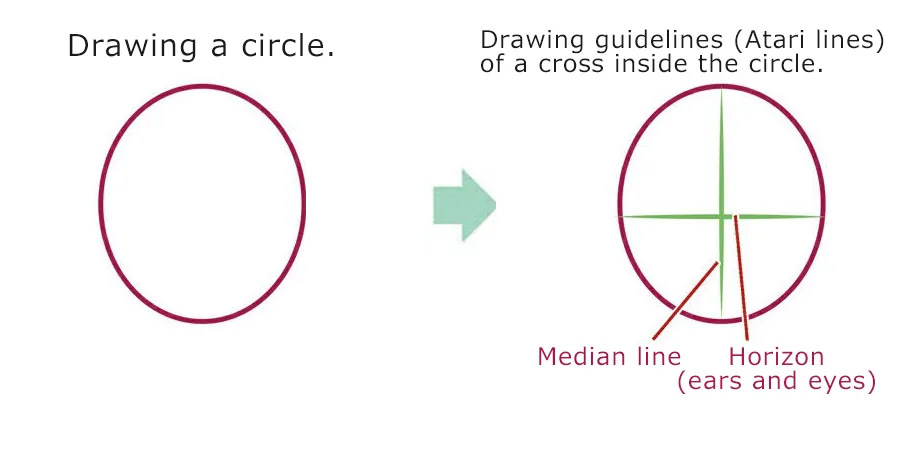
The Atari lines for a character’s face involve drawing the basic shape of the face, such as an oval or a circle, and then drawing Atari lines, which are cross-shaped guidelines for the positions of parts like the eyes and nose, within that shape. These lines are used as a reference point. The vertical line is the centerline of the face, which passes through the nose, mouth, and chin. The horizontal line is the horizontal line of Atari that becomes a guideline for the eyes and ears.
Shifting the Centerline to Change the Face Direction
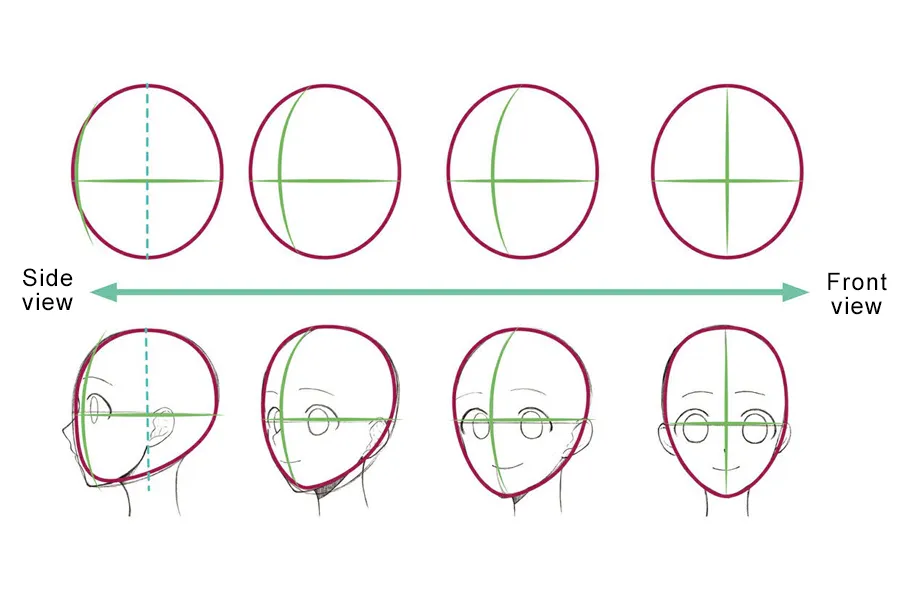
When the angle of a character’s face changes from facing front to facing sideways, you need to shift the centerline of the face to the left or right depending on the direction of the face. As shown in the diagram below, when the face turns to the left, the centerline that runs from the chin to the top of the head becomes a curved line that bulges to the left. Conversely, when the face turns to the right, you should draw a curved line that bulges to the right. Pay attention to the starting and ending positions of the centerline so that the position of the top of the head and the chin do not shift.
Shifting the Horizon Line to Change the Angle of the Face
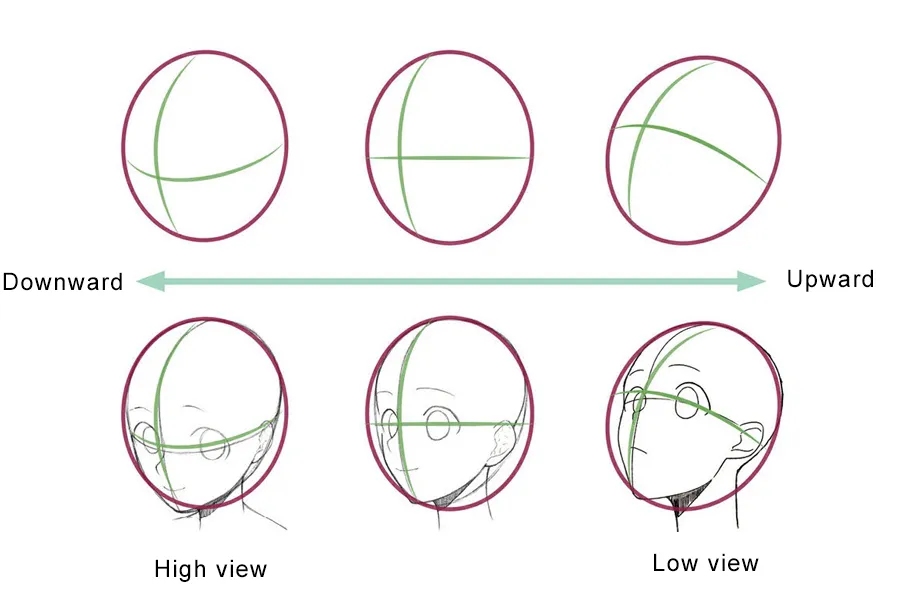
When drawing the character’s face with different vertical positions, you can use the Atari lines as a guide by shifting the horizontal line up or down. If you want to draw a face from a low angle, you can draw a curve that goes upwards, and if you want to draw it from a high angle, you can draw a curve that goes downwards. By using the Atari lines as a guide, you can create a balanced face when drawing from an angle such as looking down or up.
2 Atari lines using a cube
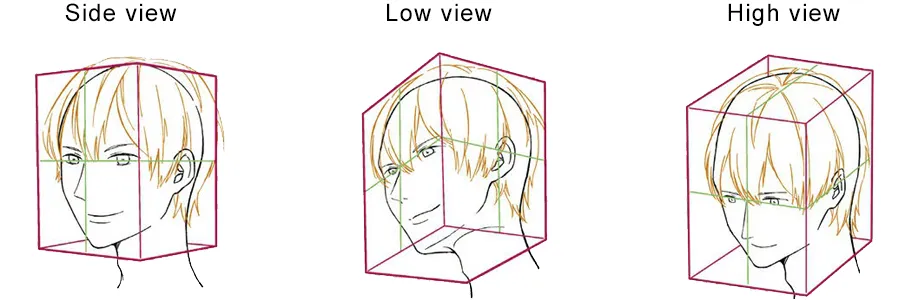
When drawing the Atari lines for a character’s face, in addition to ellipses and circles, you can also use a cube to help create a sense of depth and a 3-dimensional appearance. By using a cube as a guide, you can more easily grasp the sense of depth in the face and understand where the front, side, top, and bottom parts of the face are located.

To begin, imagine the angle at which you want to draw the face, then create a simple cube and draw an egg-shaped face within it. Then, use the Atari lines as a guide to draw the position of the facial features. Doing so will help you create a well-balanced face with proper proportions.
I hope that these explanations and reference images will be helpful for your artwork. Drawing a face using Atari lines is the most basic and commonly used method in Japanese-style illustrations, so please try to incorporate it into your work. Keep up the good work!
Anime Art Academy is on Discord! Come and join our community!