
Have you ever struggled to get your anime style faces looking just like the ones you see in your favourite shows? You’re trying out the large, anime style eyes and the small nose and mouth… but something’s just not right! Does that sound familiar??
Don’t worry – this is a problem a lot of people have when starting out. The anime style involves a lot of exaggeration, especially of the face and features like the eyes. This can make it really hard to know where those features should be placed for a natural balance.
However, luckily for us, there’s a super easy way to get a well balanced face every time!
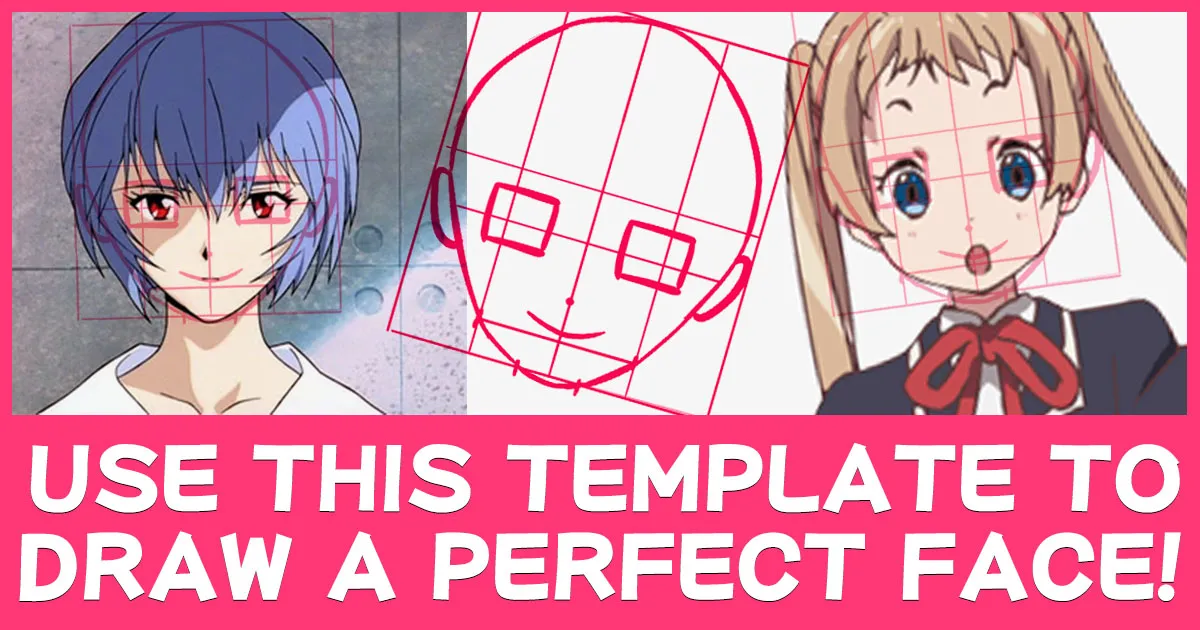
Looking at the characters below, you wouldn’t think their faces look “the same”, would you?
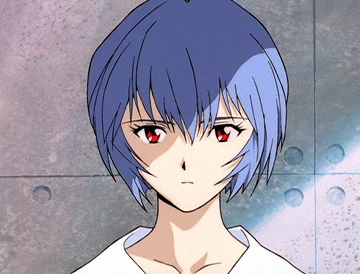
But on closer inspection, you’ll see that the basic balance for all of their faces is very similar! The shape and size of the eyes, and the shape of the jawline, chin and hairline may be different, but the position and balance of the features is exactly the same.


And it’s this balance we’re going to be learning how to replicate in our own work today using this super simple template! You’ll never end up with an off-balance looking face again if you follow these simple steps.
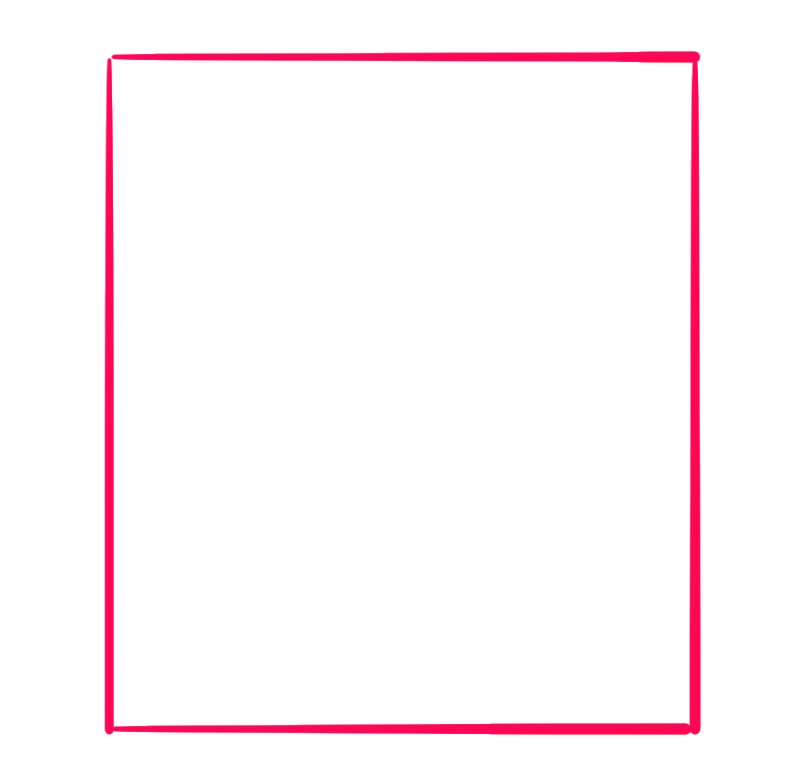
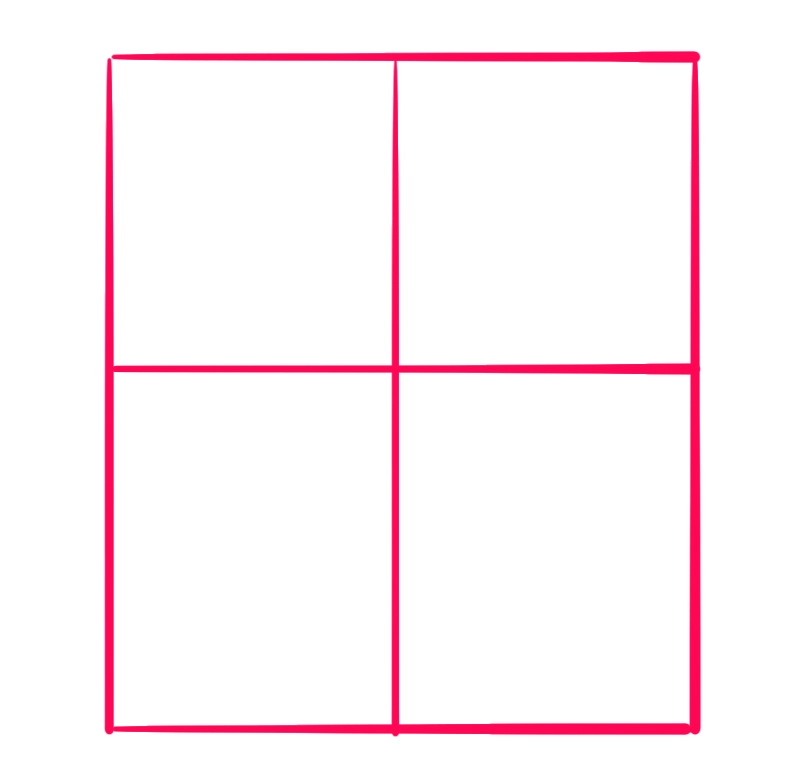
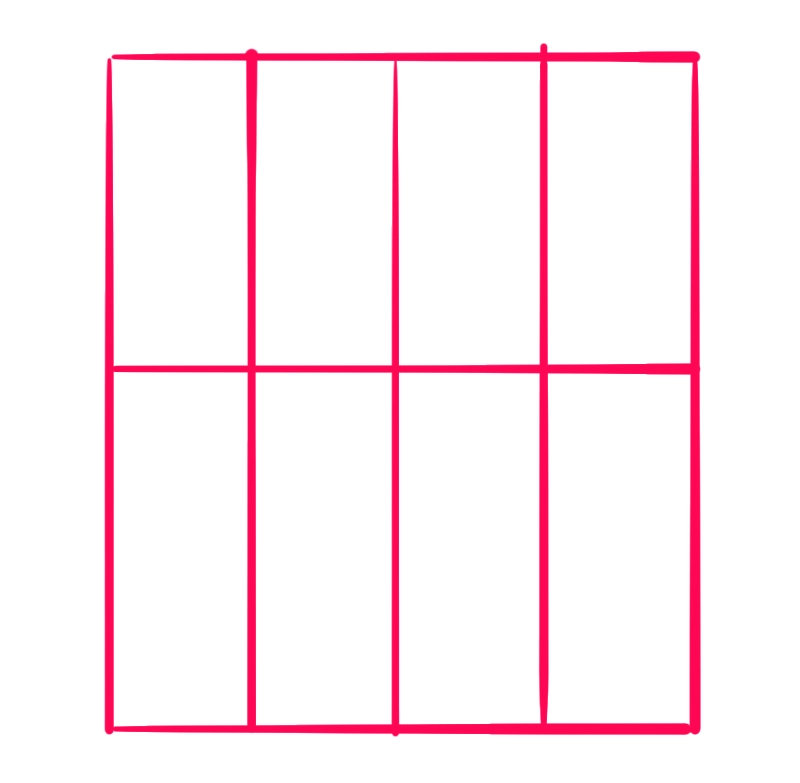
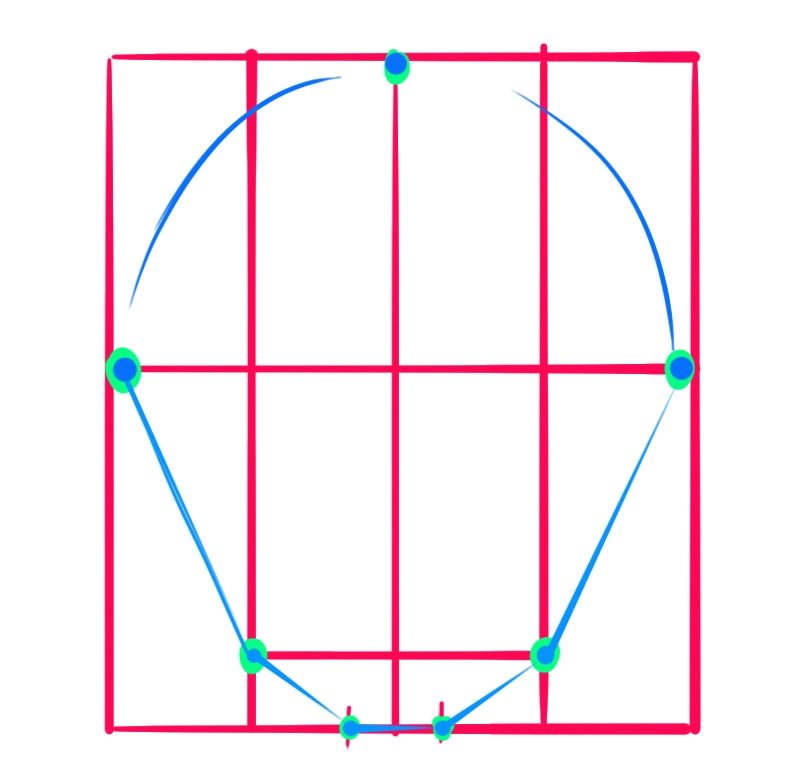
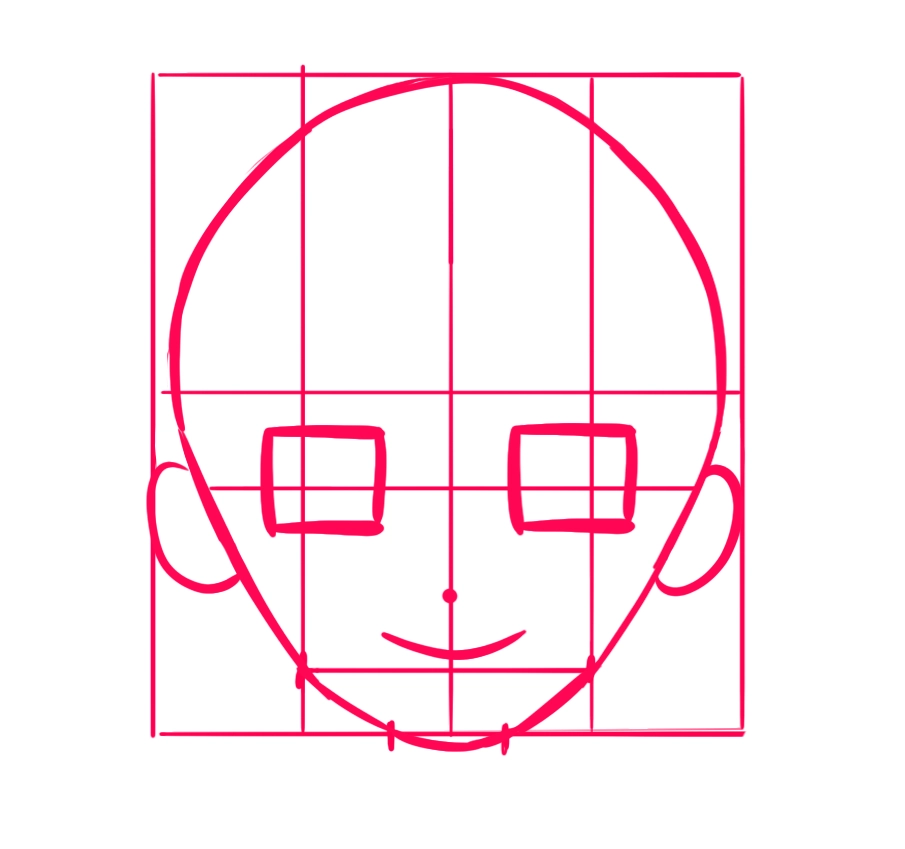
We start with a rectangle shape, and draw a cross in the middle. We want the vertical line to be exactly in the middle, and the horizontal line to be a little higher than halfway up. Use a ruler for all of these guidelines to make sure they’re perfectly straight and measured, or else there’s no point using them in the first place! It’s a perfectly symmetrical face we’re aiming for here after all.
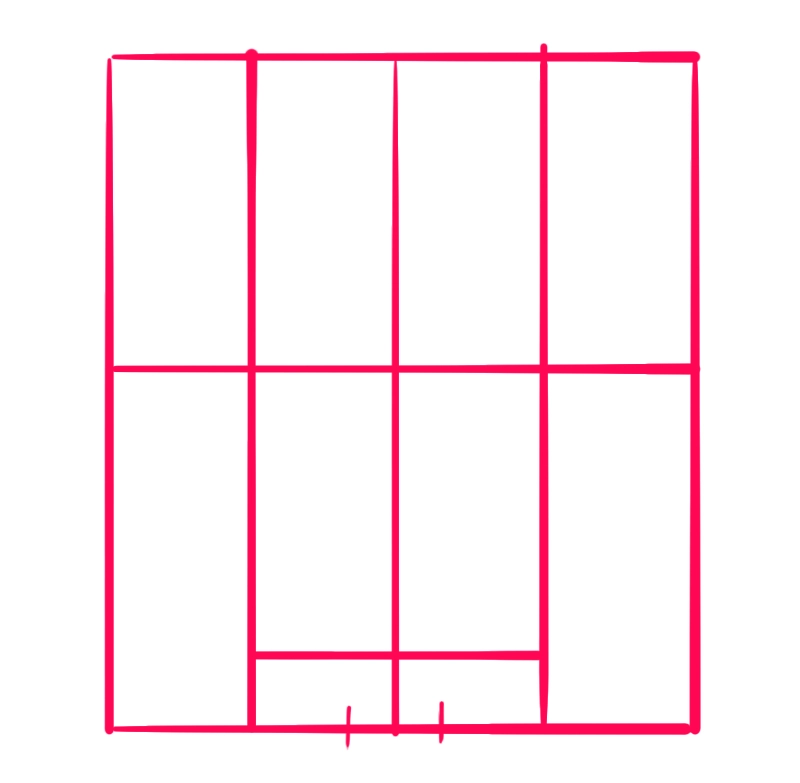
Next, we split the vertical sections in half again, with two more vertical lines, right in the middle of each section. After that, we draw a horizontal line across the middle two sections, towards the bottom of the shape. Then draw in the two marks on the bottom line to provide a guide for the chin. Make sure the two marks are equal distances from the centre line!
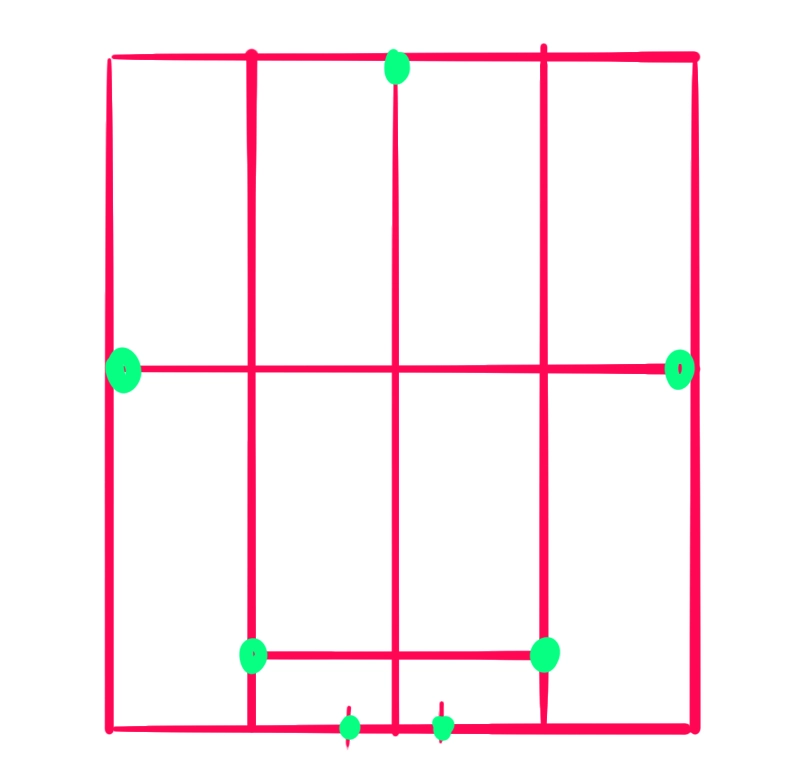
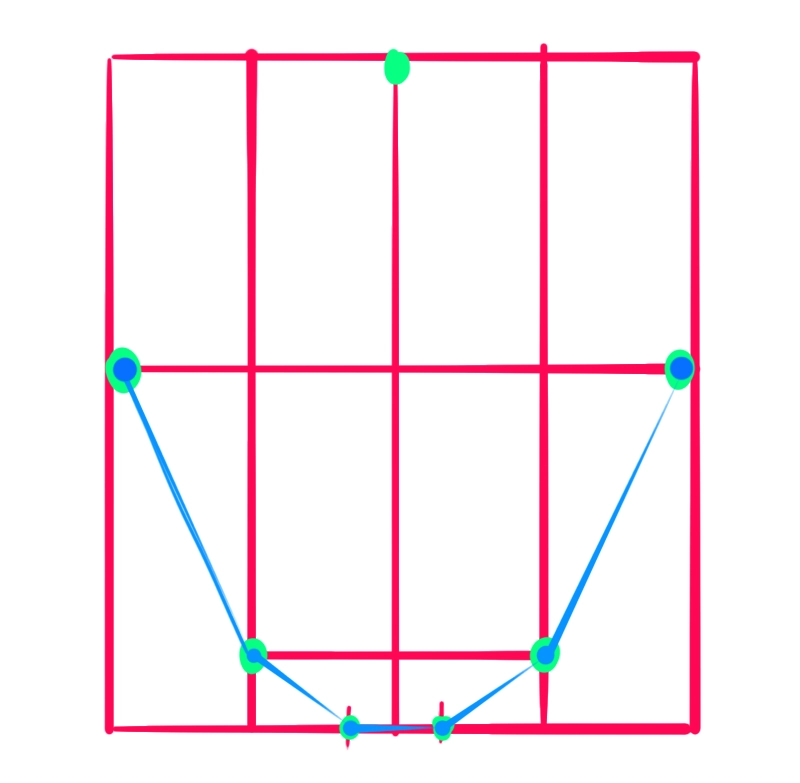
Now we play a simple game of join the dots! Join up all the points marked in green. Again, using a ruler can help here, since these are just guidelines. We’ll be drawing over them freehand later.
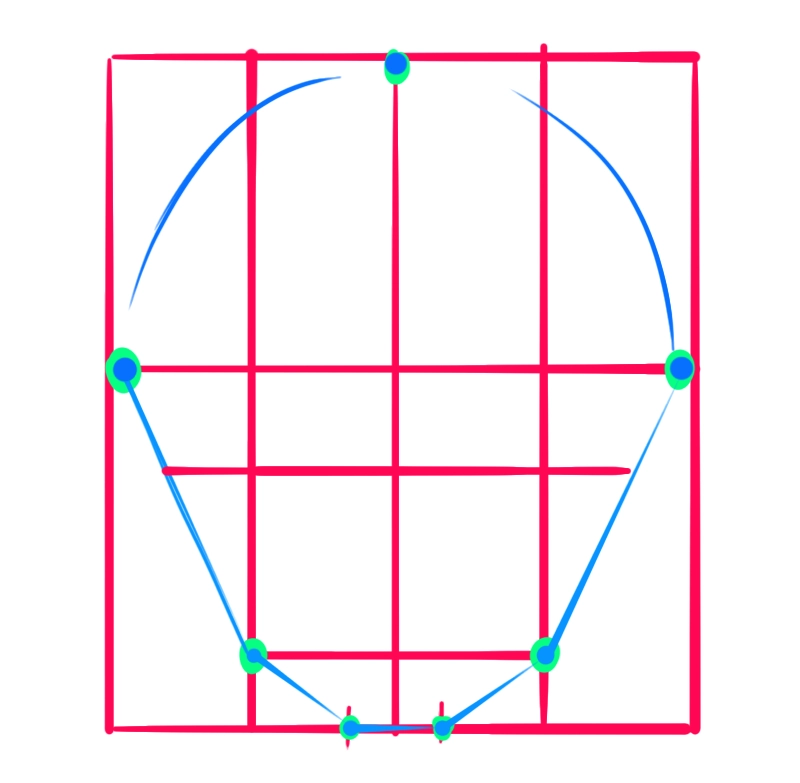
For the top lines, we want to join them up with curves. This bit is tricky, but try to use one, loose, fluid motion. You might have to erase and try again a few times, but keep going until the top of the shape looks as even as possible.
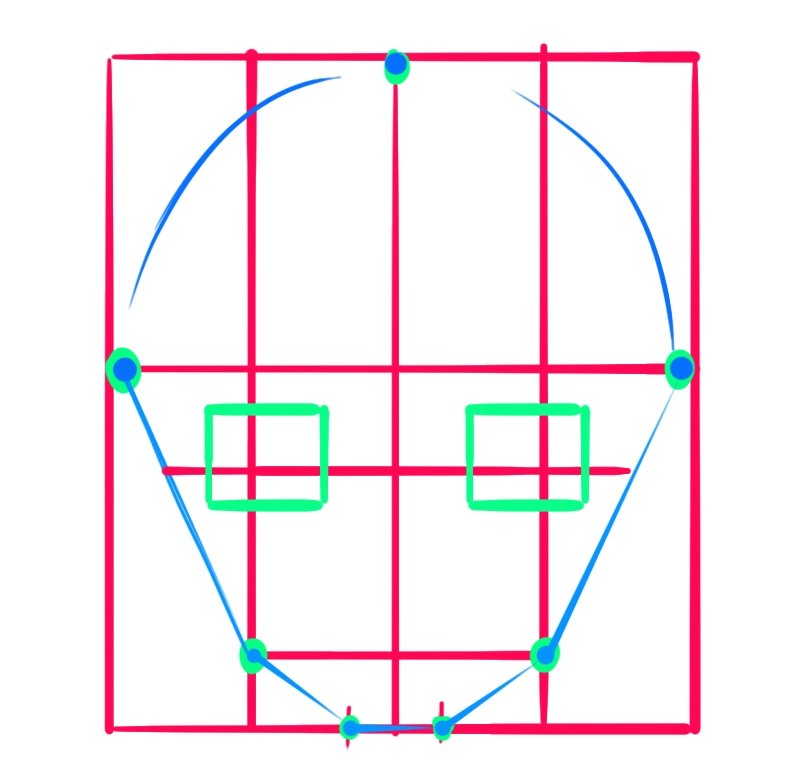
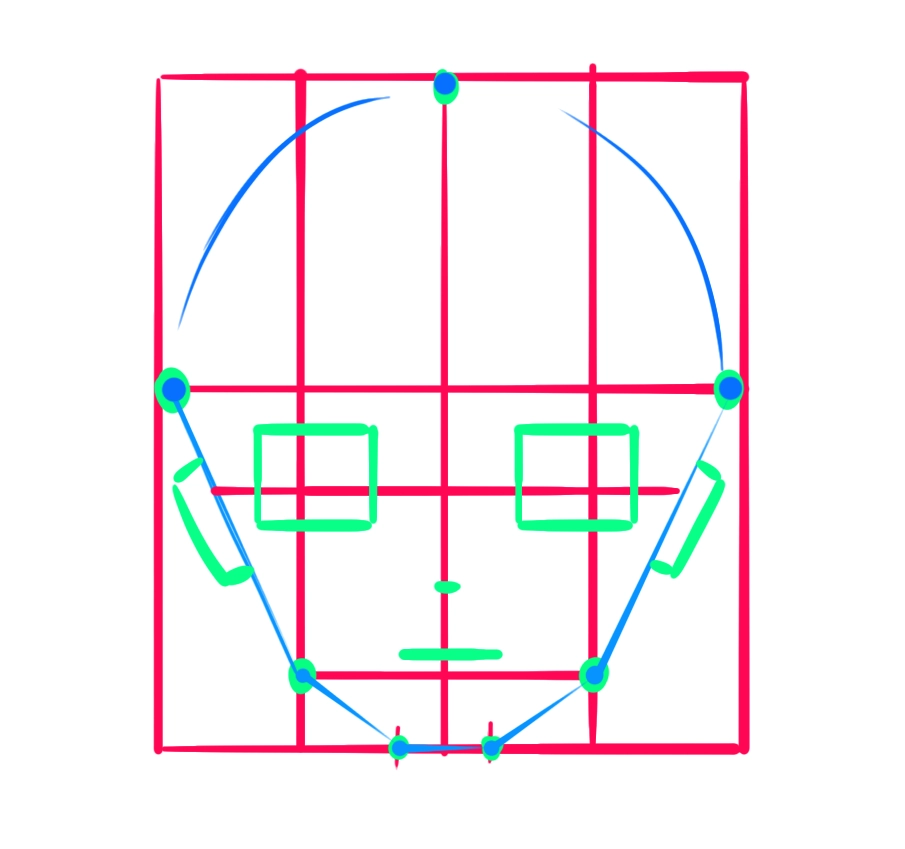
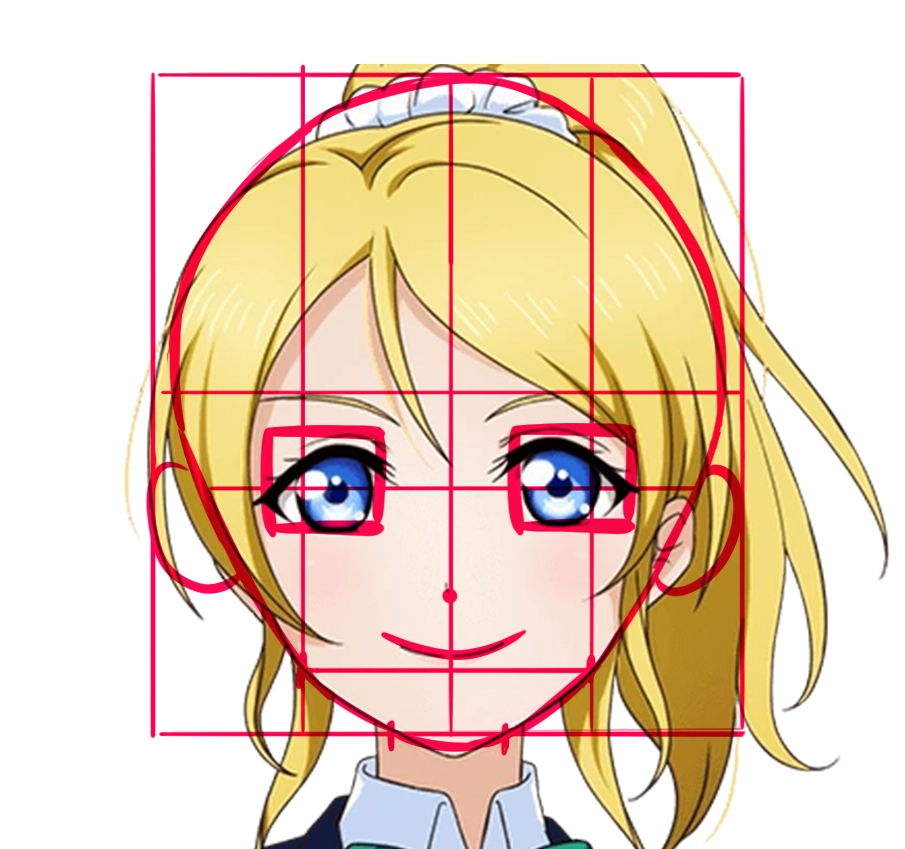
Next, we draw in the position of the eyes, nose, mouth and ears in the places shown. For the eyes, try to leave one eye’s worth of distance between the eyes for the best balance. Remember to measure these shapes out carefully so they are even. Uneven eyes will really throw off the balance of a face, so be careful here.
Finally, we smooth out all of the lines, and we have our finished template!

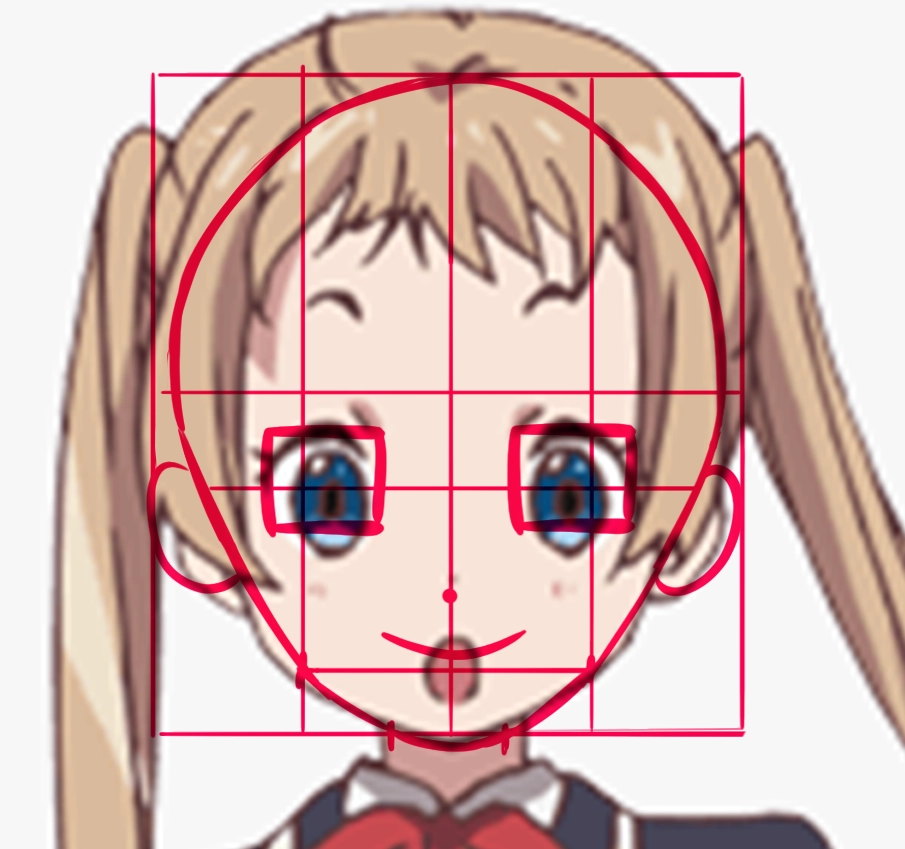

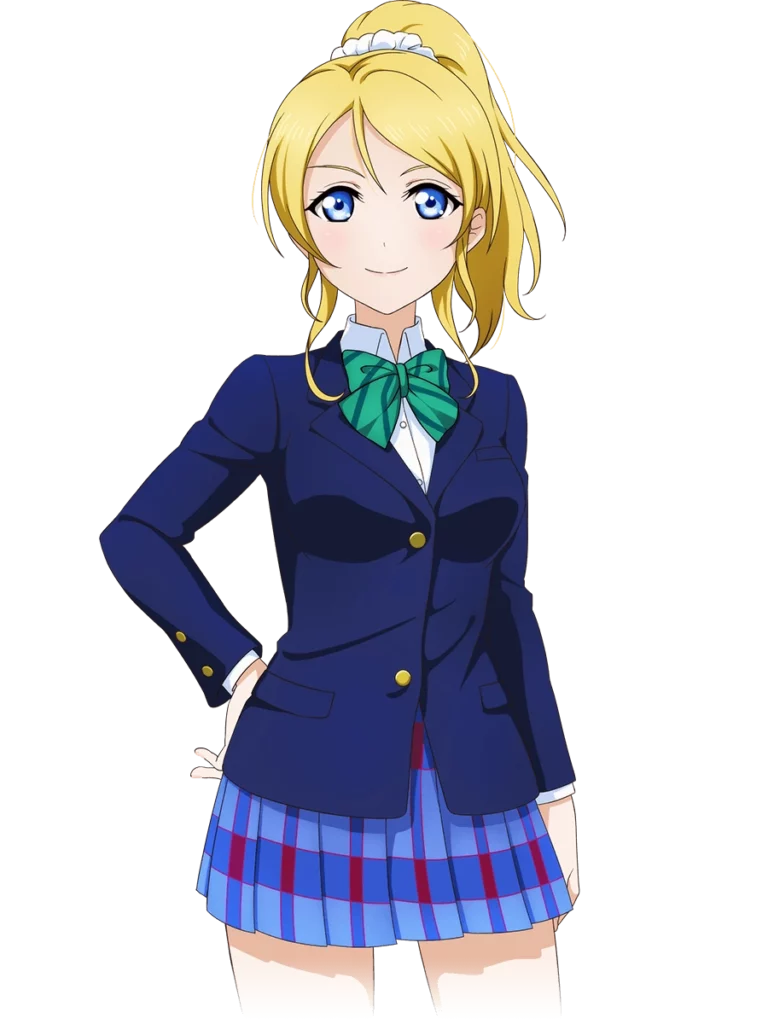
As we saw earlier, you can use this template as a base for all kinds of anime girls’ faces!
I mentioned about changing the shape of the chin/jaw earlier, and here’s how you can do that:
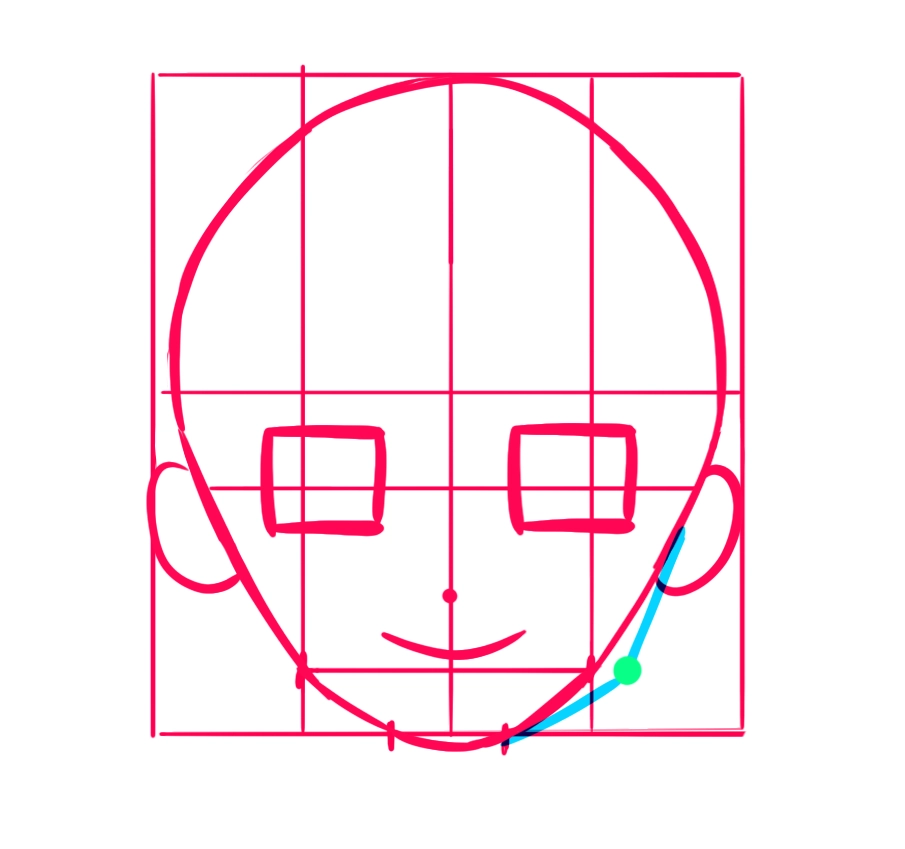
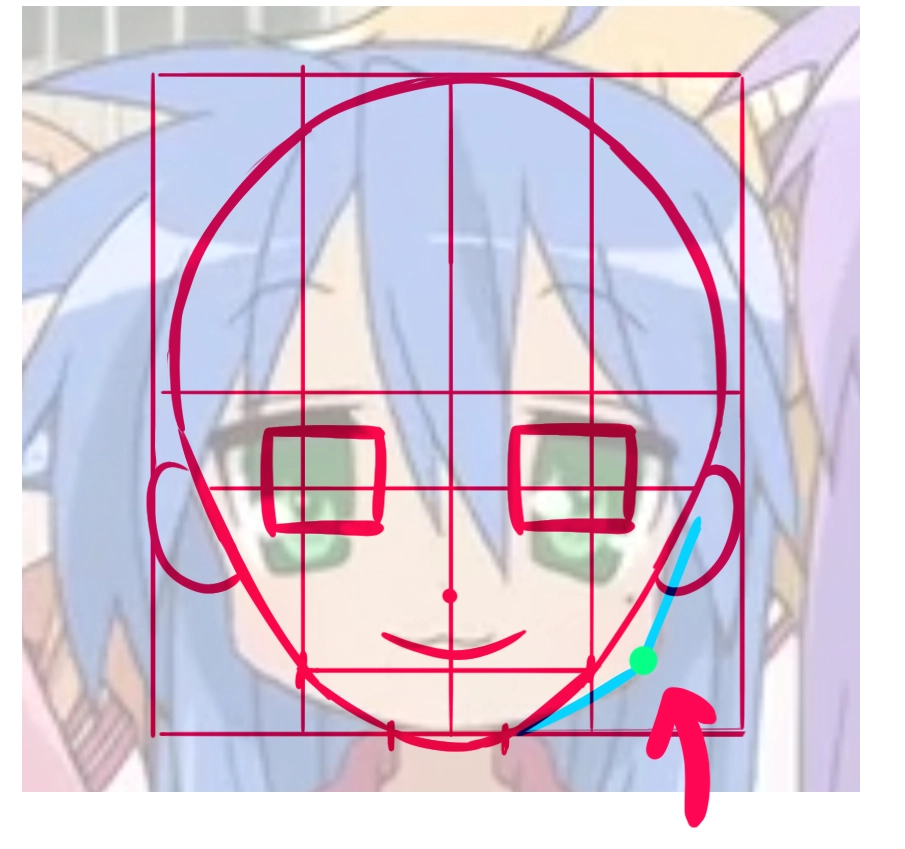
Simply changing the position of the jawline “dot” marked in green here will totally change the shape of the face and the style of the character!
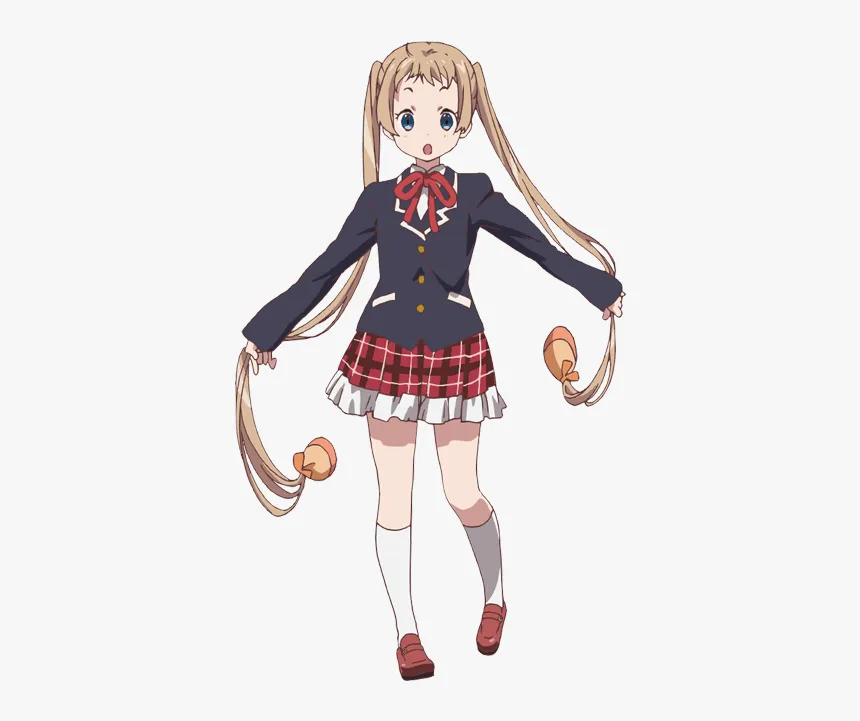
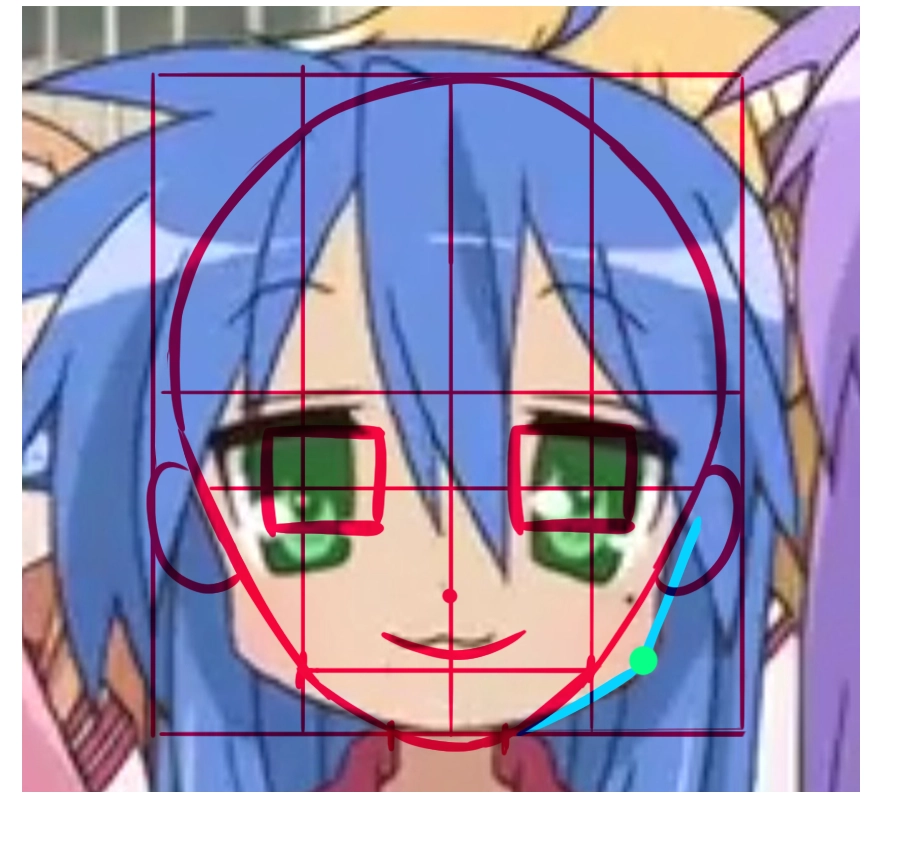
For example, you wouldn’t think a hugely stylised art style like we see in “Lucky Star!” would use this same template… but take a look at the image below and see – all that’s been changed is the position of this jaw point! The eyes are much larger too, but the position fits with our template.
I hope you’ll all use this useful template to create some great balanced anime faces of your own! We’re always excited to see our students’ work, so be sure to post it in the comments section of our video lectures and get personal advice from our teachers. We’d love you to Tweet us your work too!
Happy studying everyone!
Anime Art Academy is on Discord! Come and join our community!